

The Problem
Last year I worked on an engagement that was a Sitecore 8.2 Update 2 solution using Sitecore Helix. I borrowed some elements from the Helix example solution, Habitat. Some of the elements used that impacted CI configuration include the use of gulp.js and gulpfile scripts, the solution folder structure, and serialization via Unicorn.
When it came time to setup automated deployments with Octopus Deploy, at the time, I didn't find much in the way of how others were configuring Octopus with Helix based solutions. I hope this post, and the previous post on automated builds (Part 1), can be a road map for you or provide a starting point for your CI setup journey.
The Solution
As with the previous post, I will focus on the configuration and setup that is specific to a Helix based project. Configuration of other aspects of Octopus Deploy can be found here.
The deployment process, for this solution, is responsible for the following:
- deploying the solution
- applying serialized items
- removing serialization support
These three responsibilities correspond to a step in the deployment process. NOTE: The use of Unicorn in this solution necessitated these particular deployment responsibilities. If you're not using Unicorn, steps 2 and 3 would not be necessary or would be configured differently.
It's also worth noting, not every step will be executed for each role or target environment. For example, steps 1 and 3 execute for both the SitecoreCD and SitecoreCM roles, but step 2 only executes for the SitecoreCM role. Whereas, steps 1 and 2 execute when deploying to the Dev and QA environments, but all three steps execute when deploying to the UAT and PROD environments.
Octopus Deploy s ability at applying transformations is used heavily in this project in a couple of different ways. First being the traditional application of transform by applying a file that contains a set of changes to an original file. We are doing this for a few files in this solution such as the sitecore.config, web.config, and the domains.config. These transforms are performed across the board, for a specific environment (Dev, QA, UAT, PROD), or for a specific server type (CM or CD). Additionally, we are using transformations in conjunction with variable replacement to apply the correct values for configuration entries like connection strings, service addresses, pathing, etc. for the each environment.
Before we take a detailed look at each step of the deployment process, let us get some pre-required configuration out of the way.
Step Templates
There are a few step templates, not available in the set of step templates that come out-of-the-box, that will need to be configured.
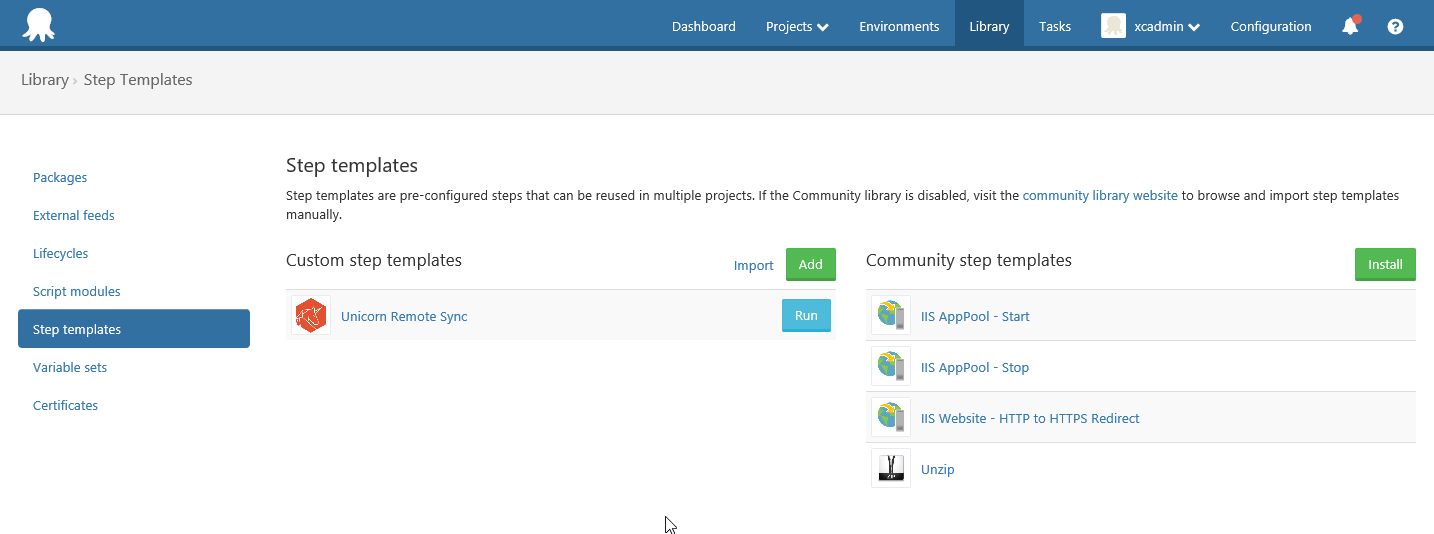
The following Community Step Templates will need to be installed:
- IIS AppPool Stop
- IIS AppPool Start
- Unzip
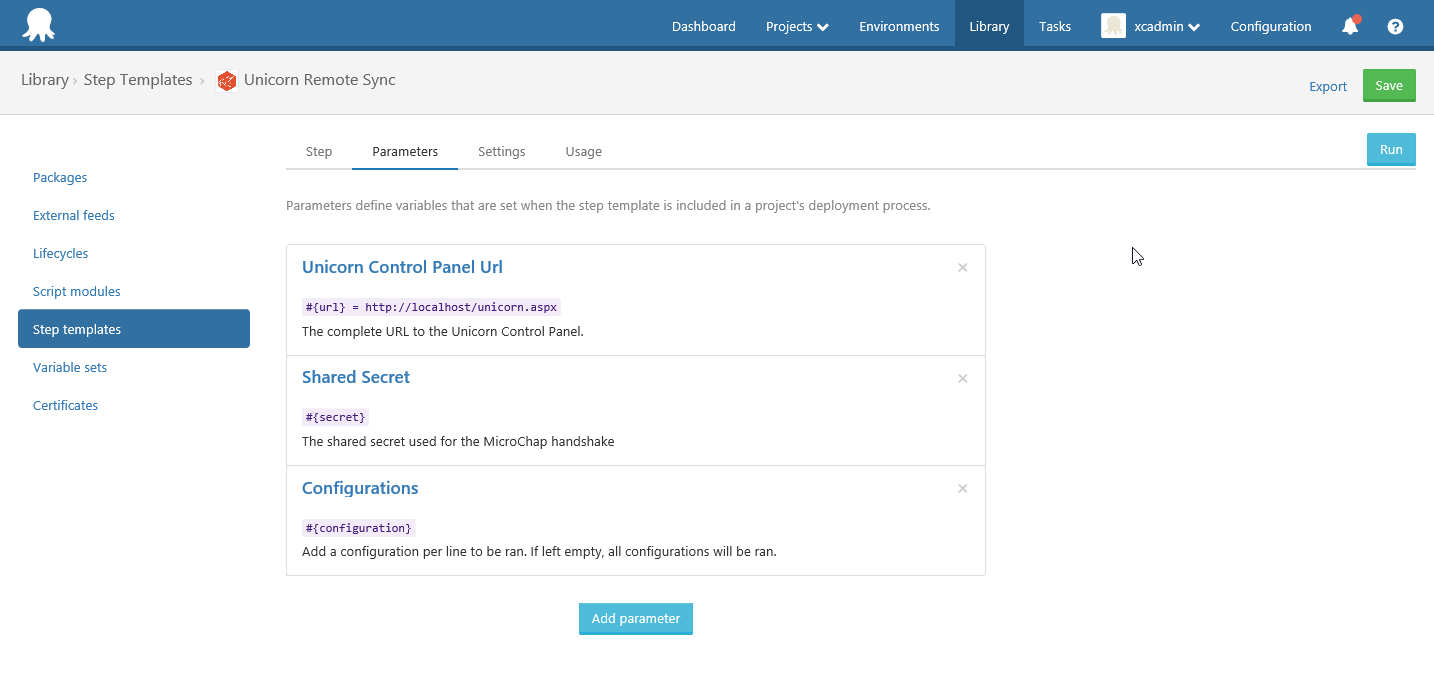
The community step templates available for Unicorn Sync didn t work for me. So, I created my own based on the PowerShell script from Unicorn.
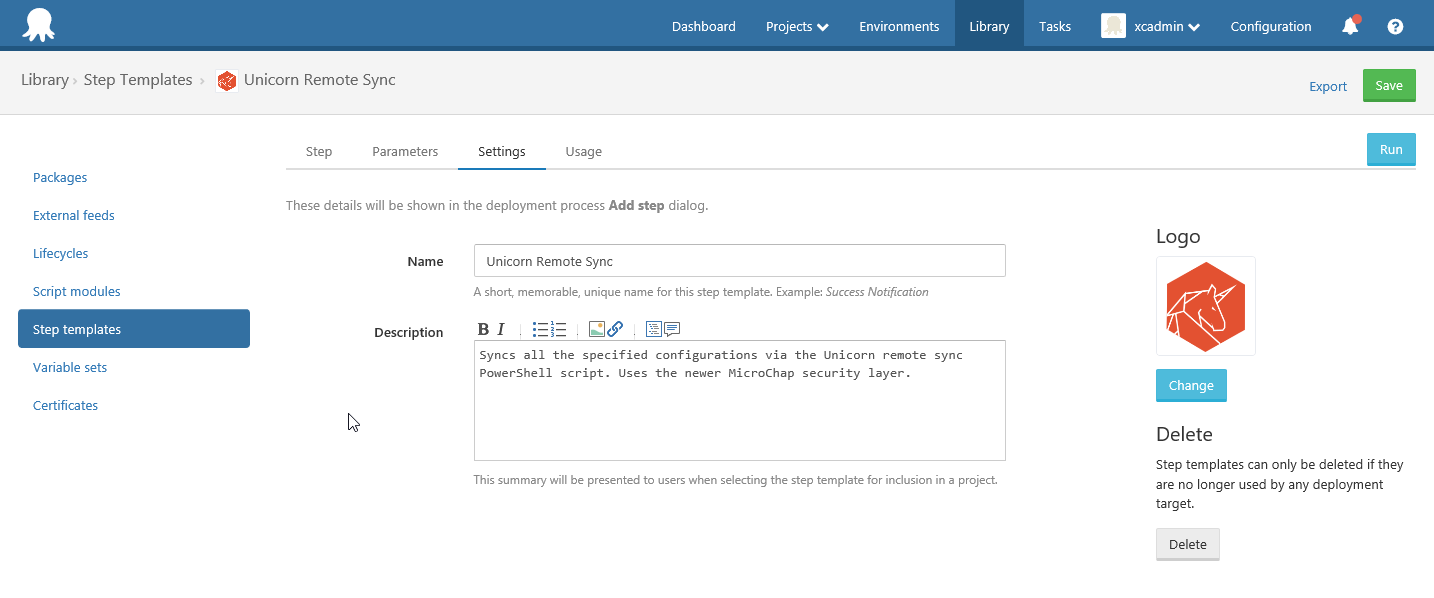
After specifying the Name and Description, I needed to define the PowerShell script and define the step parameters.
Now that the step templates needed for this deployment process have been made available for use, we can define the Deployment steps.
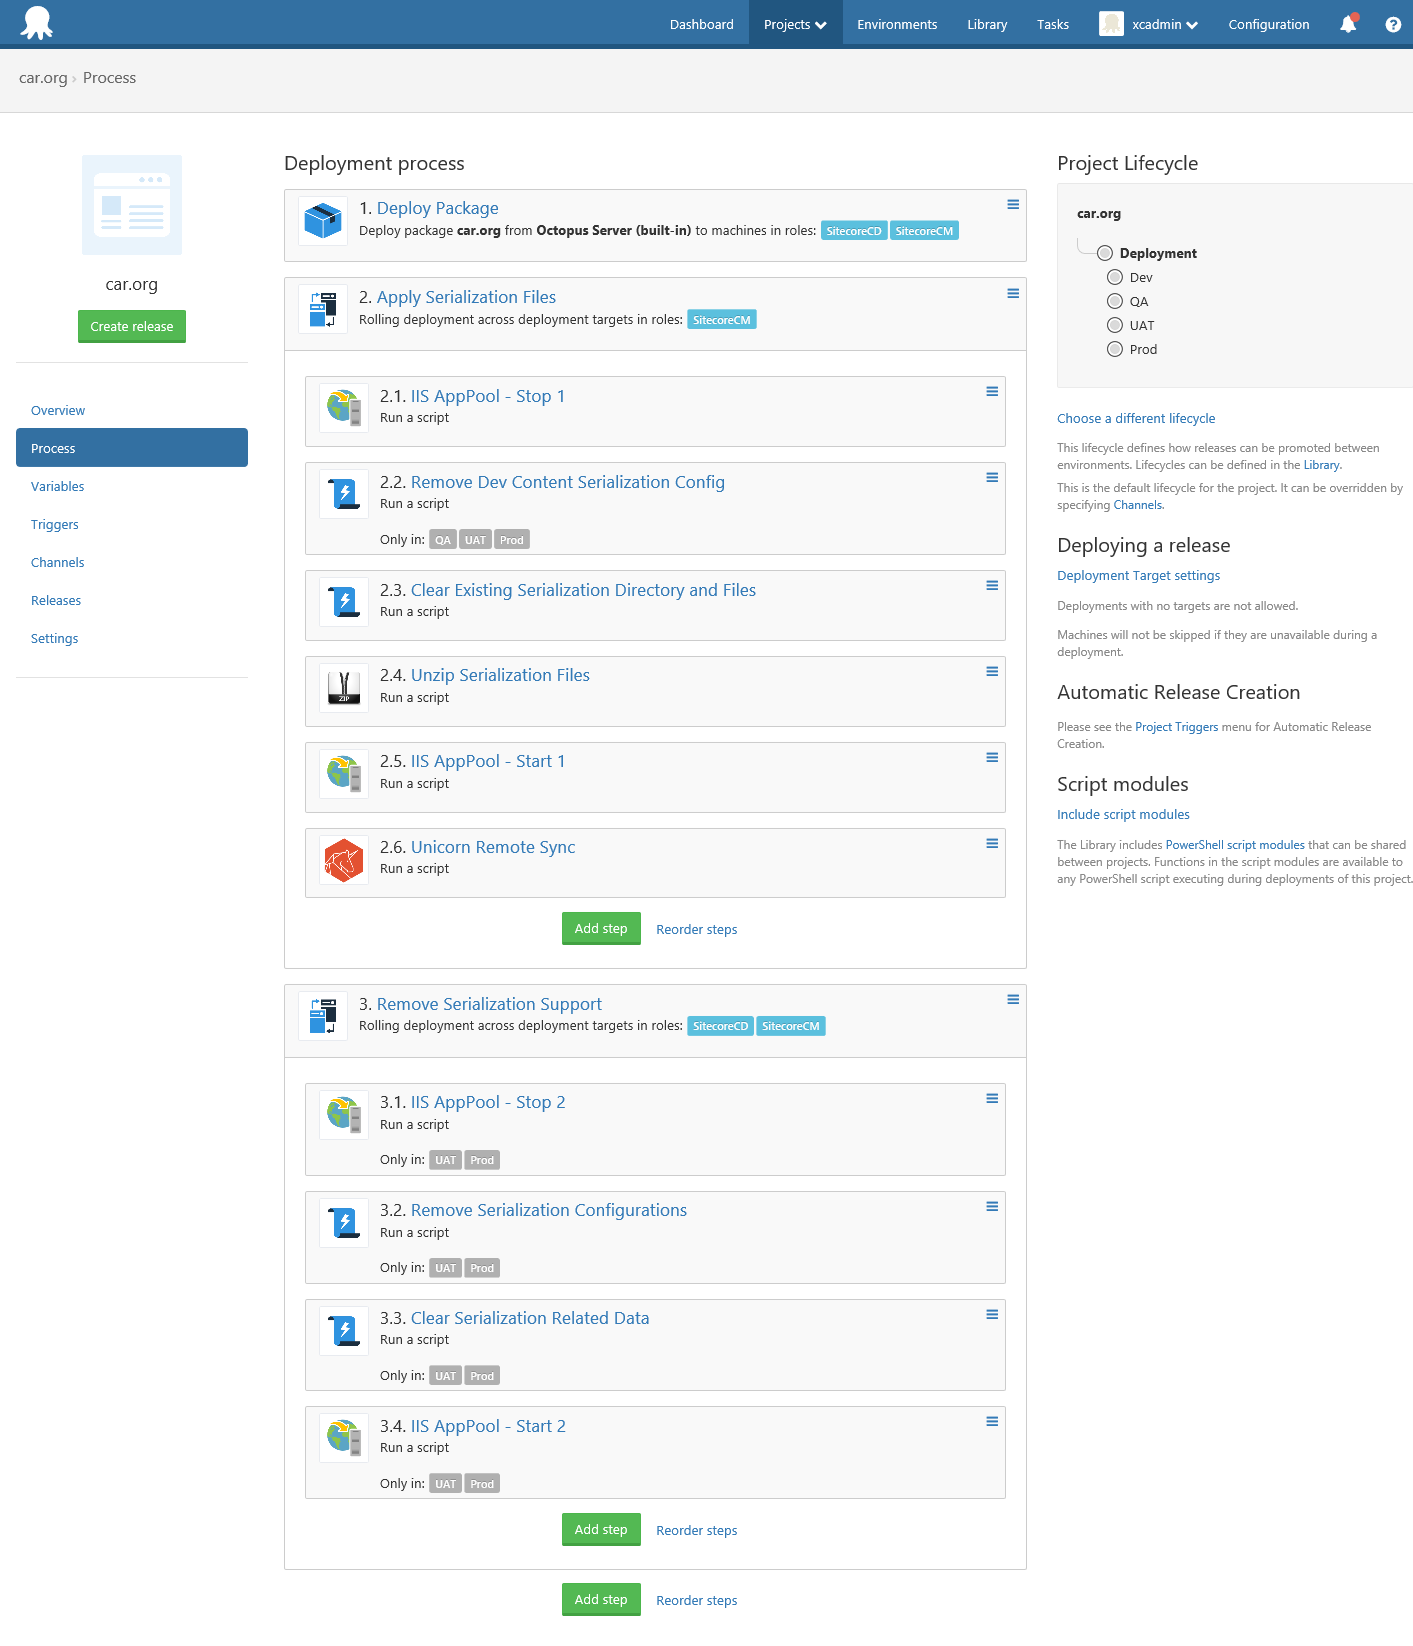
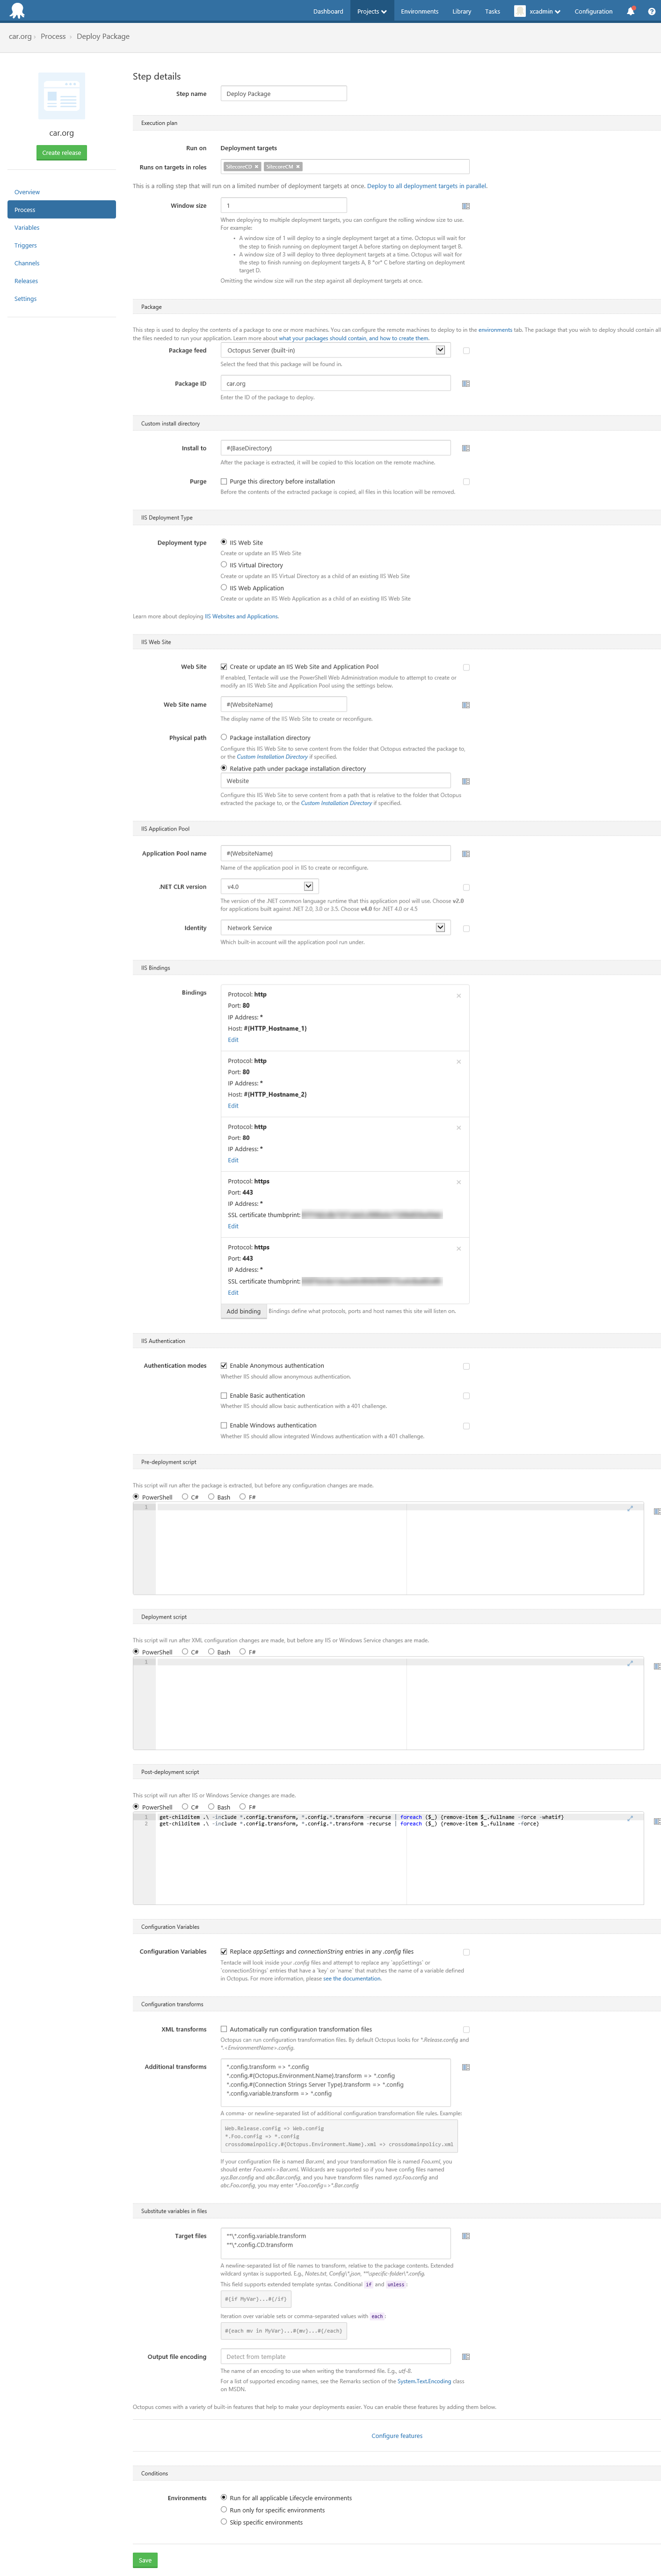
Step 1 Deploy Package
This step is responsible for taking the Octopus package built in TeamCity and deploying it to the servers. Additionally, this is where we configure variable replacement, transforms, and a post deployment PS script to do some housekeeping and clean up the *.transform files. Execution of this step has been configured for both SitecoreCM and SitecoreCD roles.
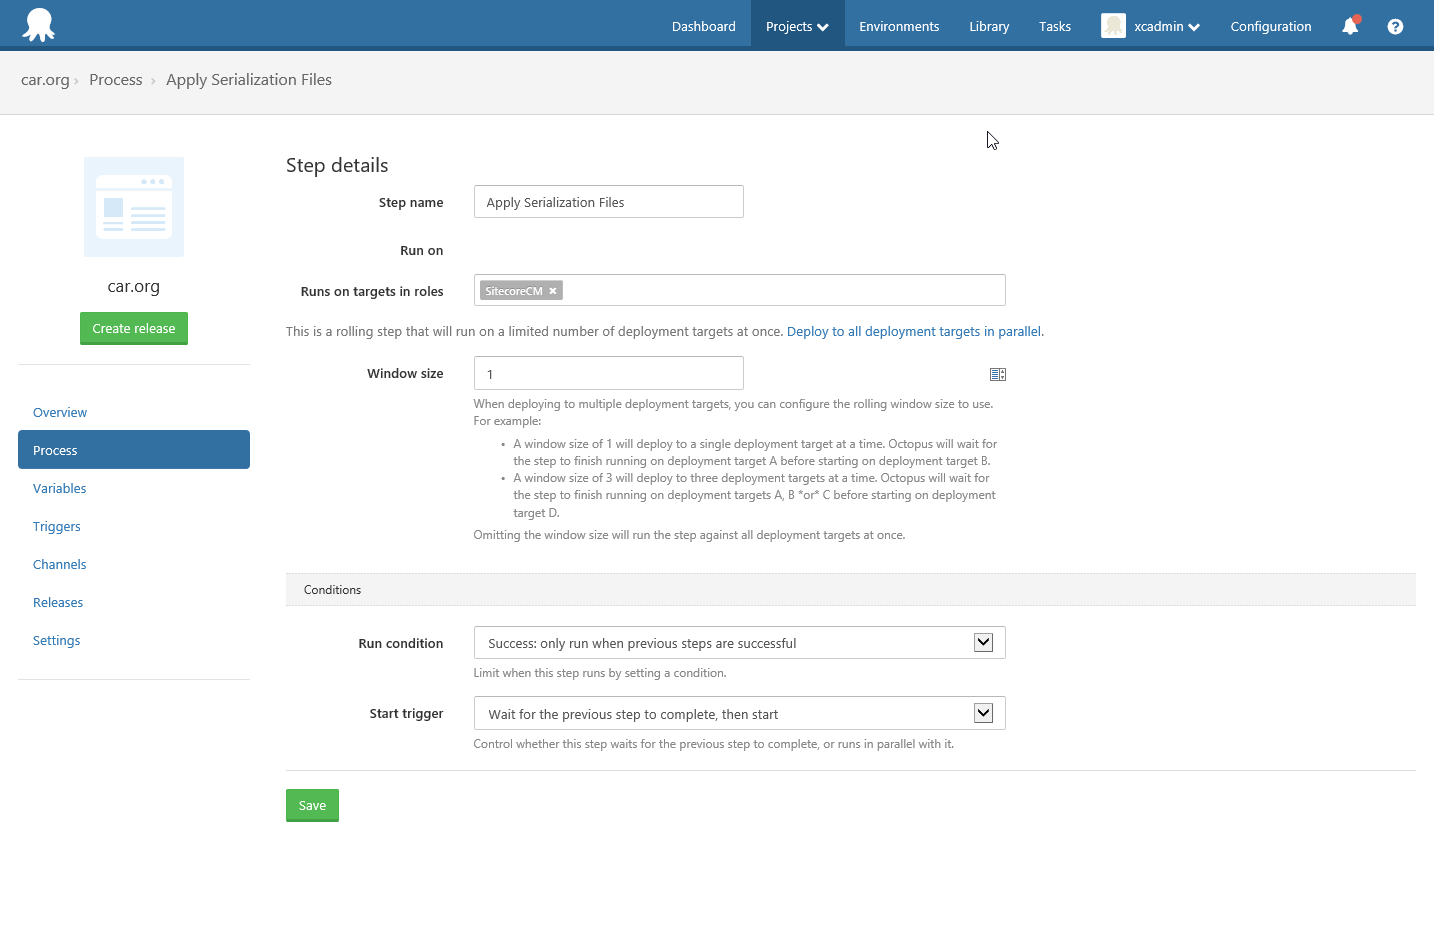
Step 2 Apply Serialization Files
This Step Group is used to organize all the steps necessary to apply serialization files. Execution of this step group has been configured for the SitecoreCM role, only, since serialization has no context on content delivery servers.
Step 2.1 IIS AppPool Stop 1
I discovered the hard way, that the app pool needs to be stopped to be able to consistently unzip and apply serialization files. This step is responsible for stopping the app pool in preparation of modifying files used by the website.
Step 2.2 Remove Dev Content Serialization Config
When deploying to the QA, UAT, and Prod environments, we do not want development content to be serialization into those environments. Therefore, this step removes the config file responsible for serialization of development content.
Step 2.3 Clear Existing Serialization Directory and Files
Before we unzip the serialization files associated with the current deployment, we'll need to clear the existing files to ensure we don t inadvertently sync an item that was removed.
Step 2.4 Unzip Serialization Files
This step is responsible for unzipping the serialization files that were zipped up during the creation of the Octopus package in TeamCity and will be used by Unicorn to synchronize the target environment.
Step 2.5 ISS AppPool Start 1
Now that we've prepared the serialization files for synchronization, it's time to restart the app pool.
Step 2.6 Unicorn Remote Sync
Now that the website is back up, we can call Unicorn Sync and update the target environment with the serialized data for this deployment.
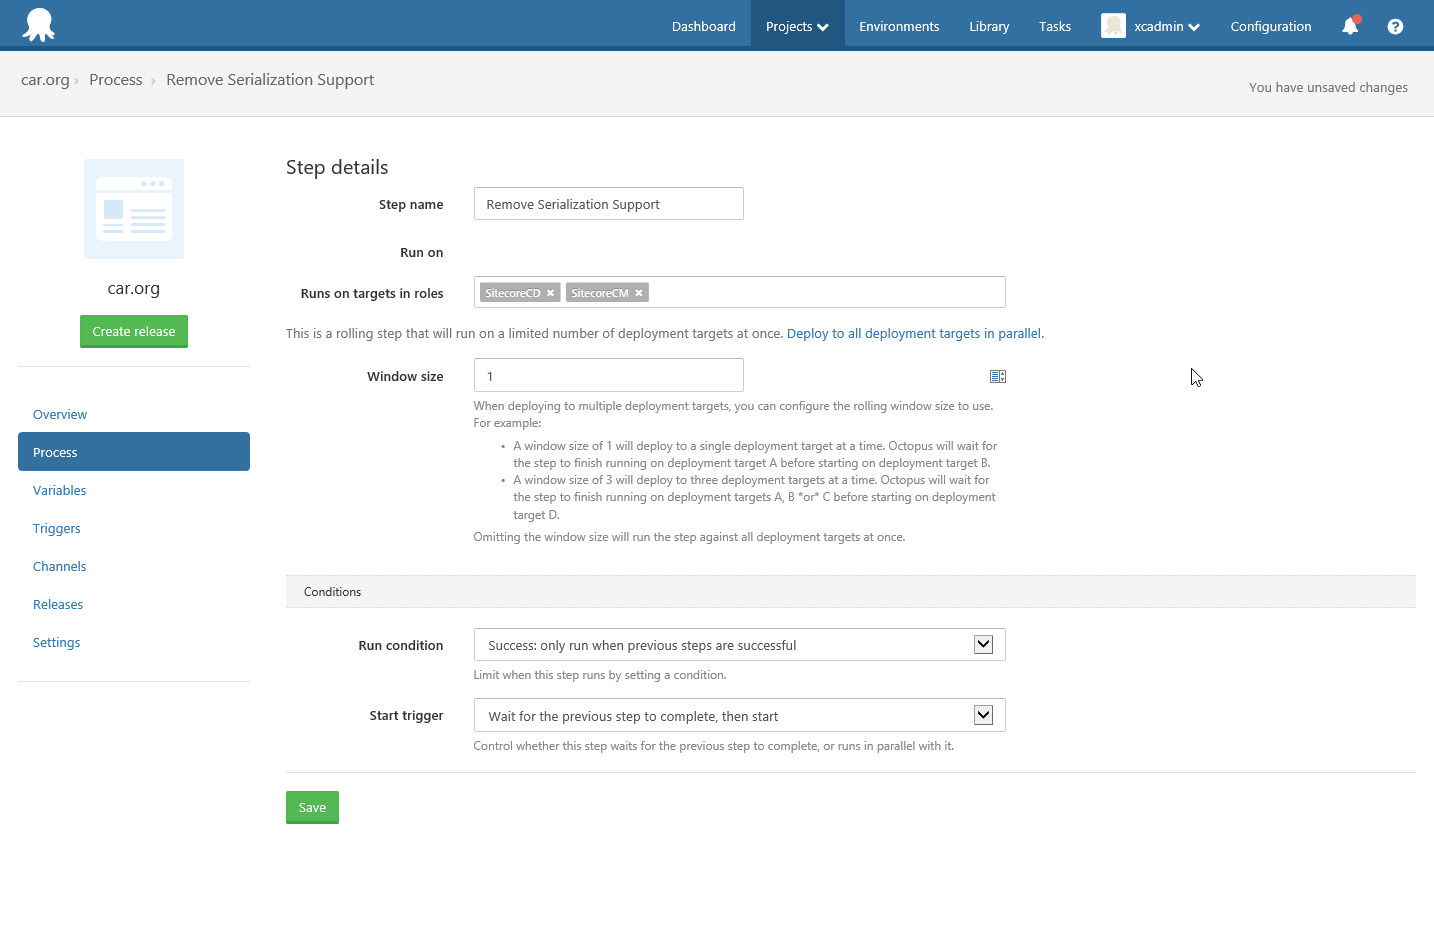
Step 3 Remove Serialization Support
This Step Group is used to organize all the steps necessary to remove serialization support. Execution of this step group has been configured for both the SitecoreCM and Sitecore CD roles since serialization support gets deployed to both server types.
Step 3.1 IIS AppPool Stop 2
When deploying to the UAT and Prod environments, we do not serialization support for those environments. Therefore, this step is responsible for stopping the app pool to insure consistent behavior when removing files used by the website.
Step 3.2 Remove Serialization Configuration
When deploying to the UAT and Prod environments, we do not serialization support for those environments. Therefore, this step is responsible for removing all of the serialization configuration files.
Step 3.3 Clear Serialization Related Data
When deploying to the UAT and Prod environments, we do not serialization support for those environments. Therefore, this step is responsible for removing all serialization files from the data directory.
Step 3.4 IIS AppPool Start 2
When deploying to the UAT and Prod environments, we do not serialization support for those environments. Therefore, this step is responsible for restarting the app pool once all files necessary for serialization support have been removed.
With the knowledge you, now, possess after reading this part, and hopefully part 1, of this blog series on Sitecore Helix and Continuous Integration, you should have a blueprint for setting up CI for a Helix based solution. If not, at the very least, you should have a starting point for your own setup.