

Helix was introduced by Sitecore in 2016 as a set of official guidelines and recommended practices for Sitecore Development. Since then, the community has been supporting the initiative and many websites have been built using this approach. A well-known website that was built to demonstrate in practice the Helix principles and guideline was the Habitat.
This blog walks you through how to Setup a Sitecore Project from scratch using Helix principles and Habitat resources. The main goal it s to show how we can start from a new Sitecore Project from scratch using existing resources (Scripts, Configs files, and some Foundations and Feature modules) already being implemented. This blog does not detailed topics of the foundation layer/modules such as SitecoreExtensions, Metadata, Dictionary or gulp scripts. The goal of this blog is to show how to take advantage of those pre-built scripts and modules to start your own Sitecore project using Helix. Then you are good to go ahead and develop any module in any those layers to support your business model.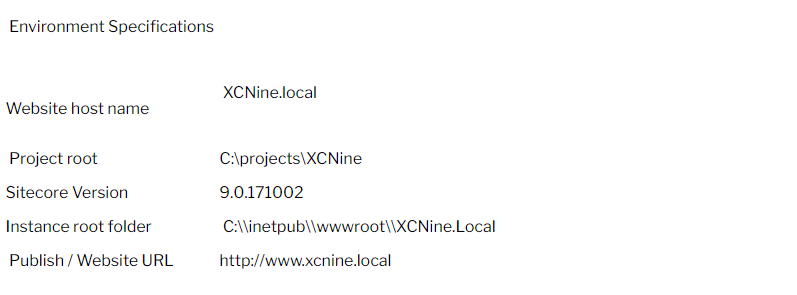
If you need help on how to install Sitecore, visit my blog Sitecore 9 - Setup Environment before Installation. Assuming at this point that you already have installed a clean Sitecore 9 instance, I will describe step-by-step how to set up your project.
LAYERS: XCNine Physical & Solution Folder Structure
Open the Visual Studio (VS 2017) and create a blank solution inside of the root folder (ex. C:\projects\XCNine). Then, create the Src folder and inside of it create the three layers: Feature, Foundation, and Projects. From the Visual Studio (VS) create four (4) solution folder Configurations, Feature, Foundation, Project. At this point, I am expecting you to have the base structure in order to start adding your first project/module.
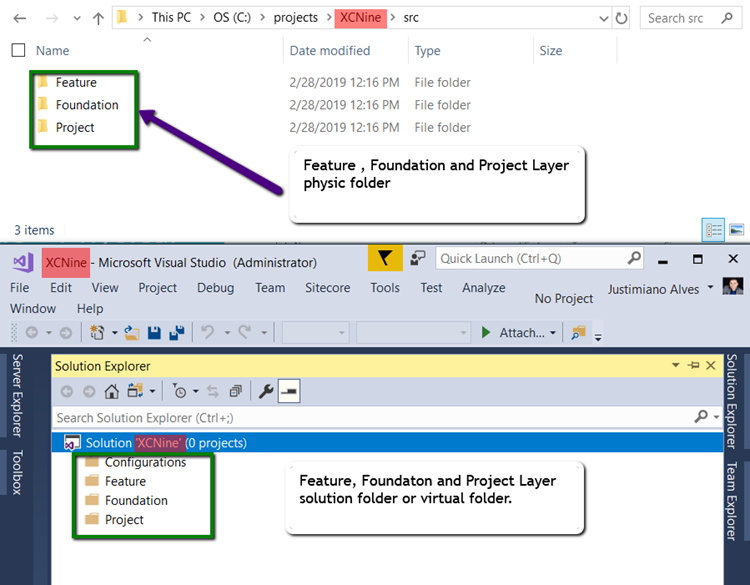
Figure 1: Physical and Virtual Structure folder
MODULE: Add Project Module to the Layer
In order to create your first module, you need first to create a solution folder that will contain the project module, as an example Dictionary. Then, right click on the folder and choose from the list of options add a new project. On the first screen choose the .NET Framework 4.6.2, and then use the VS browser to navigate to the Foundation layer and create a Dictionary folder.
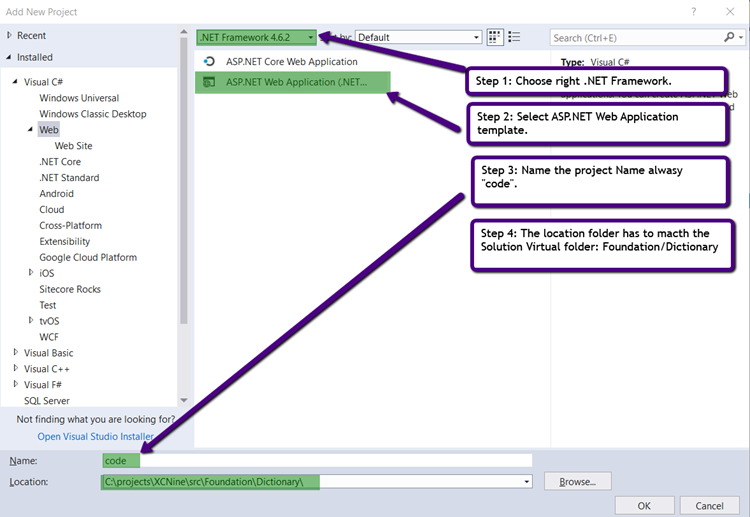
Figure 2: Foundation Module Dictionary Select Framework, template, folder and name.

Figure 3: Dictionary Module Dictionary- Project template and reference
Following the Helix naming and convention, the module name will be XCNine.Foundation.Dictionary. [See Partner, Principles, and Conventions]. Right click on the project and open the property to change the assembly and default namespace name.
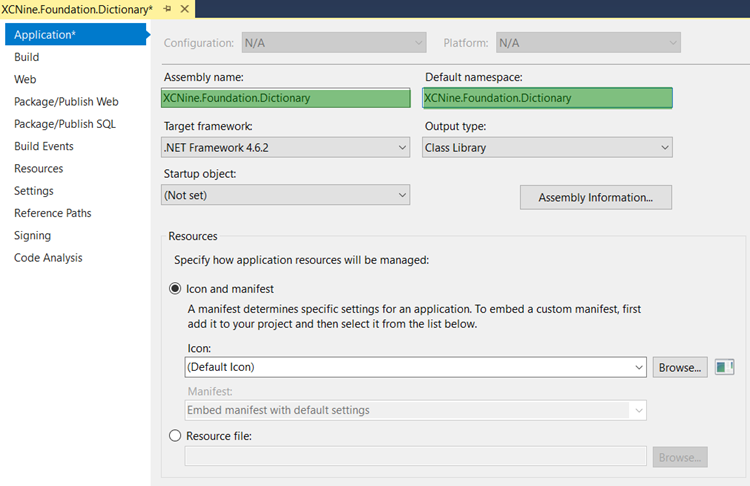
Figure 4: Update Namespace and Assembly
As the last step before kicking off the implementation of the module, you might consider doing some cleanup such as:
- Delete Global.asax file
- Delete Views, App_Data, Controllers, App_Start folder
- Update web.config build action property field to none in order to avoid being deployed and override Sitecore web.config.

Figure 5: Foundation Dictionary - Clean projects
Add Sitecore kernel and Sitecore MVC dlls through the NuGet package and ensure you choose the correct dll version.
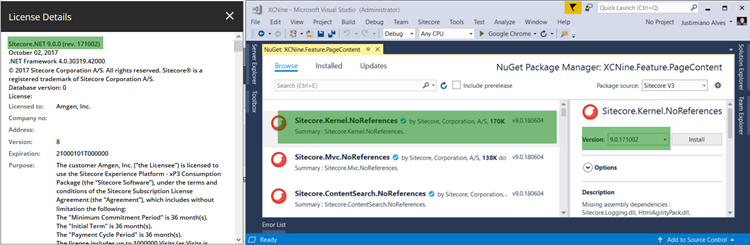
Figure 6: Sitecore Kernel Dll
DEPLOYMENT: Gulp + Unicorn
For the deployment, you are going to use Unicorn to manage Sitecore Items and Contents. Gulp will be used to run the task that deploys files, Platform files, Configurations files and more.
Install Unicorn
You can install Unicorn through NuGet package manager as you usually do for any package. However, before you install unicorn ensure you already have created the Serialization module project under Foundation Layer [ See MODULE: Add Project Module to the Layer]. Download resource regarding Serialization module from the Habitat project.
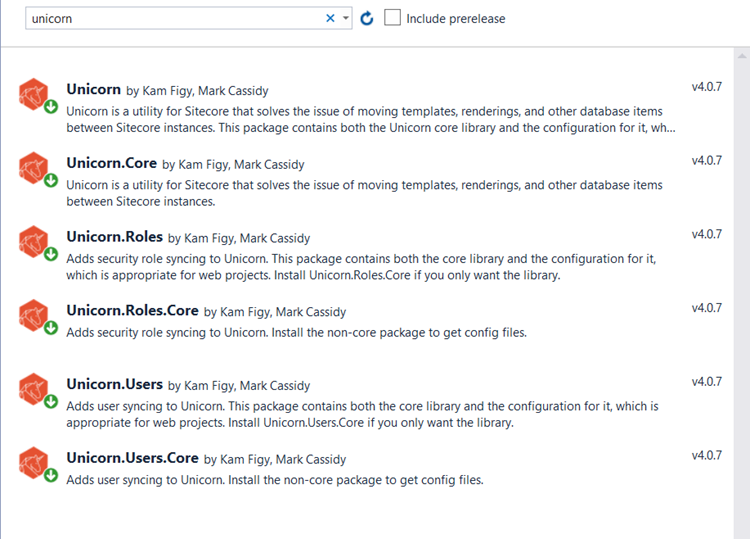
Figure 7: Unicorn References
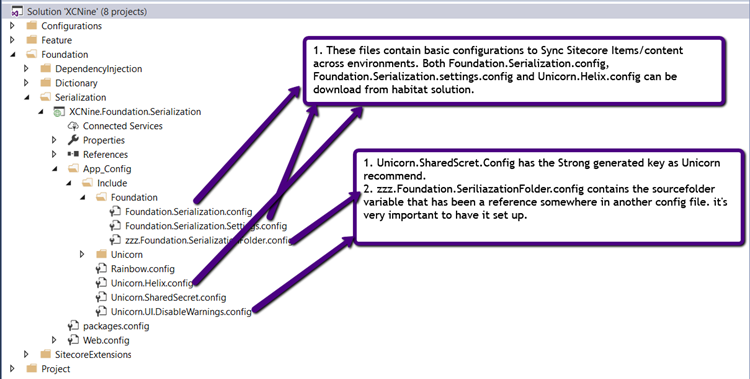
Figure 8: Unicorn - Config files
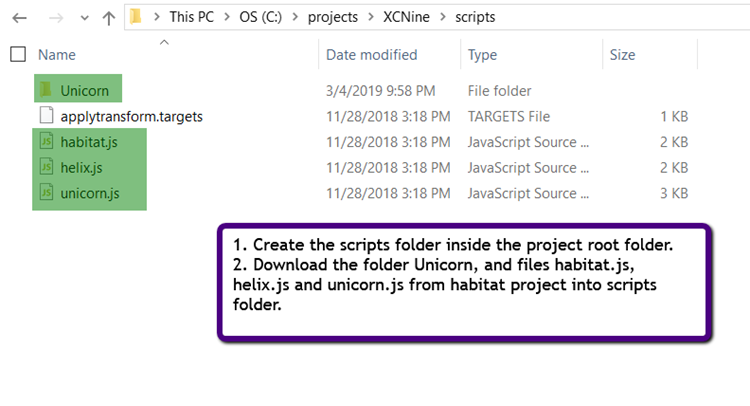
Figure 9: Unicorn scrips for Gulp Unicorn-Sync task
Install Gulp and Deploy
Download or copy from Habitat project the following files package.json, gulpfile.js, and gulp-config.js into your project root folder. Then open the command line as administrator and ensure that npm and node are installed by checking their version. To install the gulp, execute the following command: npm install gulp-cli -g.
From Visual Studio, add the Configurations solution folder and then move the following existent files gulpfile.js, gulp-config.js, and publishsettings.targets into it. Open the gulp-config.js and update variables to match your local environments.
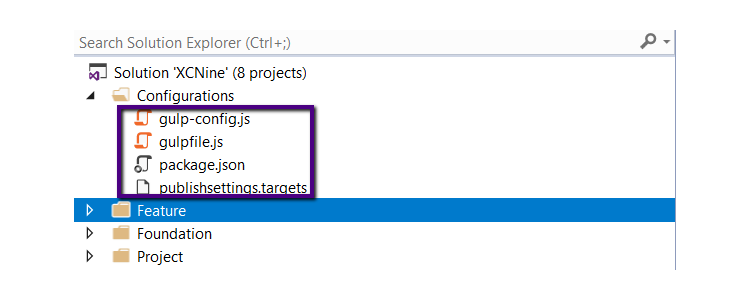
Figure 10: Configurations folder and config files
At this point, you are all set to deploy your project to the Sitecore website. Gulp Sync-unicorn will fail for the first deployment because you need to create all the root items in the Sitecore content tree that were referenced in the configurations file and the first sync needs to be done through the admin portal - http://xcnine.local/unicorn.aspx. Below is the list all Sitecore root items where the Layers (Foundation, Feature, and Project) should be created.
- Layouts - /sitecore/layout/Layouts
- Models - /sitecore/layout/Models
- Renderings - /sitecore/layout/Renderings
- Placeholder Settings - /sitecore/layout/Placeholder Settings
- Templates - /sitecore/templates
- Settings - /sitecore/system/Settings
- Media Library - /sitecore/media library
Figure 11: Unicorn Admin Page
DEMO: Metadata Module
Follow the steps illustrated on section - MODULE: Add Project Module to the Layer to create the Metadata module under Feature layer. You can get the Metadata source code from the Habitat project, which is reason why I won t cover in this blog. However, I will be sharing some screenshots related to Sitecore content items such as Metadata templates, Page template, and Home item. As a result of this demo, you should be able to see metadata information you have entered in the home Item using any browser. Login into your CMS ( XCNine.local/sitecore) and create the following Metadata templates _Keyword, _OpenGraph, _PageMetadata, _SiteMetadata and the Page (/sitecore/templates/Project/Public/Pages/Page) template that will implement those metadata templates. Change the Home item template in order to be based on the Page template.
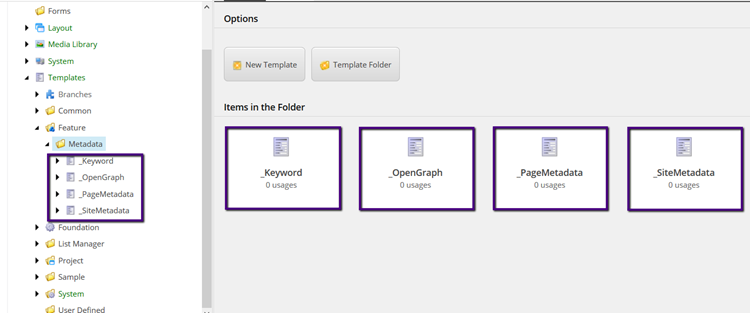
Figure 12: Metadata Module Template
Next, change the Home Item template you will see all the new sections and fields to enter the metadata information.
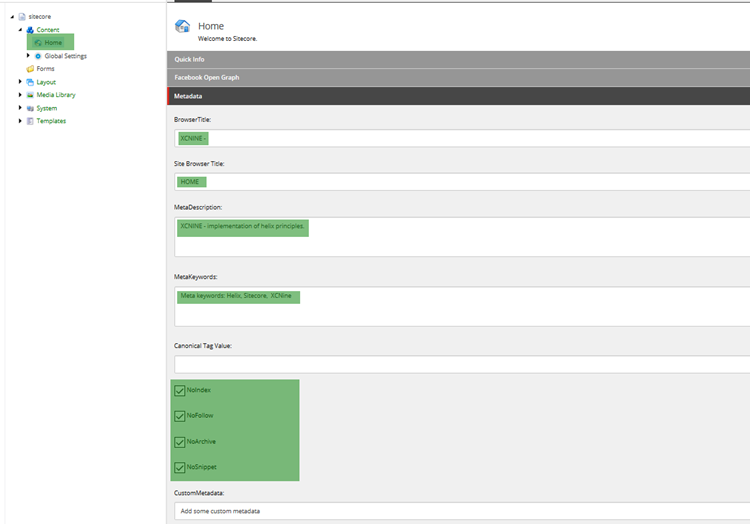
Figure 13: Metadata Module - Home Content
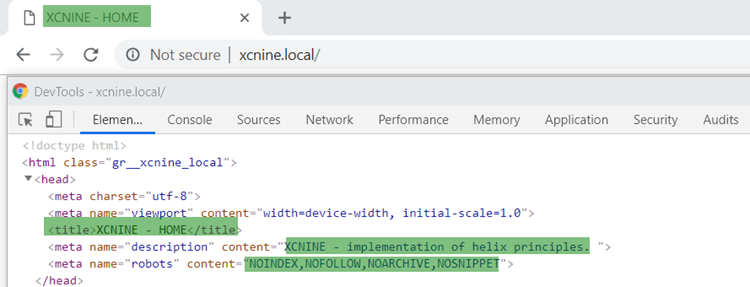
Figure 14: Metadata Module - Home Page
Thank you for visiting our website and reading our blog post. If you need help on your Sitecore project, please consider how our vast Sitecore experience can be of serice to you. We encourage you to accomplish your goals and make your project a success.