

Agents are AI assistants that perform various tasks on a user’s behalf. They accomplish this by handling questions from the user posed in natural language and they provide an answer to complete a task. To assist with completing tasks, agents execute actions. In other words, actions are tasks that can be performed by agents. Some examples of tasks are summarizing a record or getting knowledge from a knowledge base.
In addition to providing a library of standard out of the box (OOTB) actions, Salesforce Agentforce allows developers to create custom actions. Custom actions provide agents with more capabilities that are tailored towards specific business tasks. Custom actions can be creating using:
- Invocable Apex,
- Lightning flow,
- Or Prompt Template.
This blog covers the steps to create a custom action using a Lightning flow. This blog uses an example action that retrieves an order’s details which includes header information, delivery group(s) information, and line item(s) information.
Developing Lightning Flow
To use a flow as an Agentforce action, you need to create a new Autolaunched Flow and define the flow’s inputs and outputs. It is important to define all the inputs and outputs upfront because once the action is created, you cannot change the interface. In our example of retrieving order details, we have a single input and two outputs. The input is orderId, which is the OrderSummary record Id. The two outputs are outputMessage (the return status of the flow) and order (the order details retrieved). Figure 1 below illustrates the configuration for the orderId input. 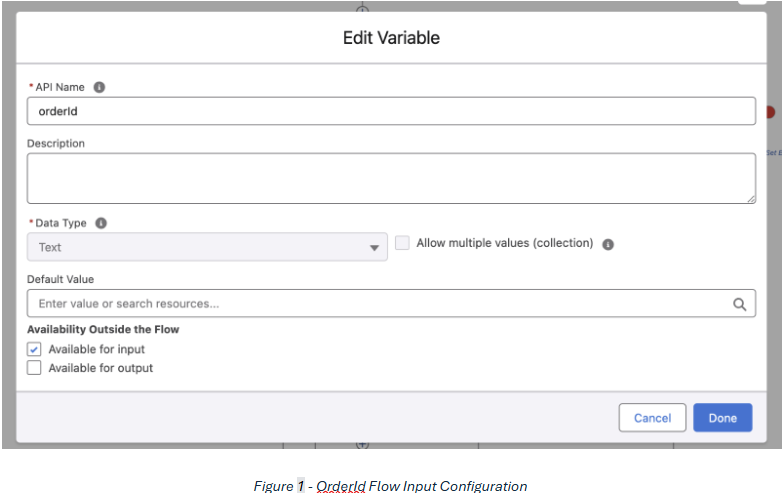 After you have declared your interface, you can start developing your flows logic. In our example, our flow retrieves an OrderSummary record by its Salesforce record Id, and it groups its OrderItemSummary records by OrderDeliveryGroupSummary. Figure 2 illustrates the entire flow logic.
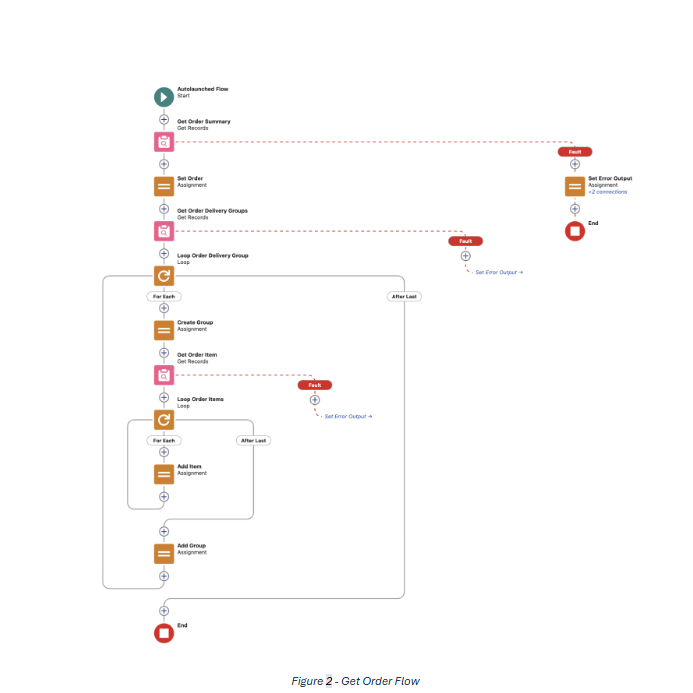
Create Agent Action
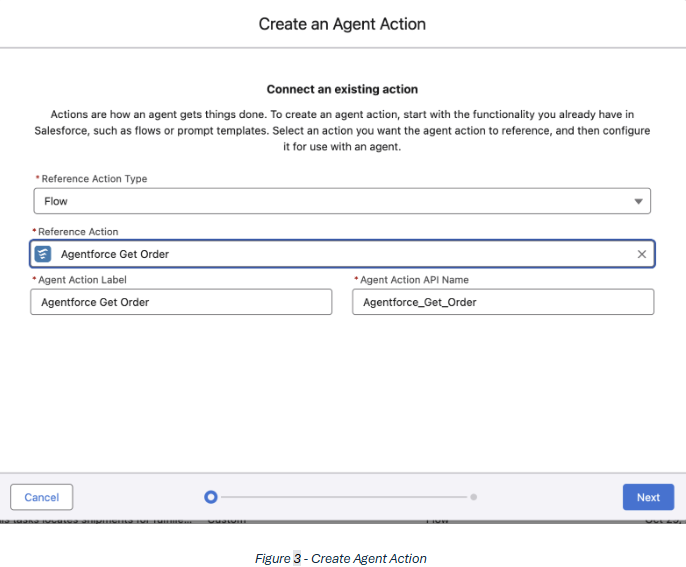
Now that we have the flow, it is time to create the action in Salesforce Setup menu. In Agent Studio select Agent Actions and create a new action. We are going to name our action Agentforce Get Order as illustrated in Figure 3 below.
Next, we want to configure the instruction and interface for our action. Figure 4 below illustrations the action configuration.
The instruction describes what the action does. Best practices for instructions are one to three utterances for the action. For the inputs and outputs, you want to describe what each does. There are additional options for inputs which include:
- Require input
- Collect data from user.
At least one input must be required and selecting the collect data from user checkbox means the value comes from user input.
For outputs, you have the options to show in conversation or filter from agent action. At least one output must be selected for showing in conversation which displays the parameter value to the user. Selecting filter from agent action hides the output parameter from the agent.
Add Action to Agent
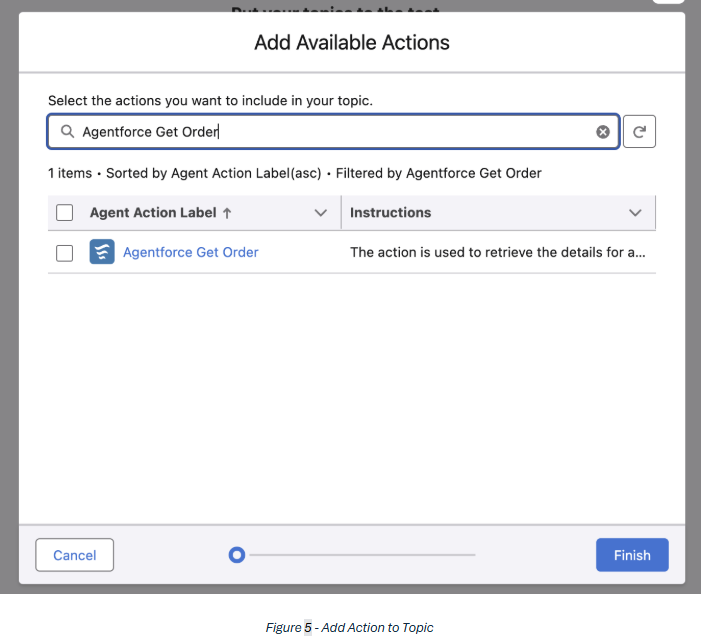
Now that the action is configured, we want to add it to our agent. In Agent Studio go to Agents and select your agent and open it in Agent Builder. Actions are added to topics from the topic panel. To add an action to a topic, select a topic and then go the This Topic’s Action tab and select New. From here, we want to Add from Asset Library and search for our custom action Agentforce Get Order as illustrated in Figure 5 below.
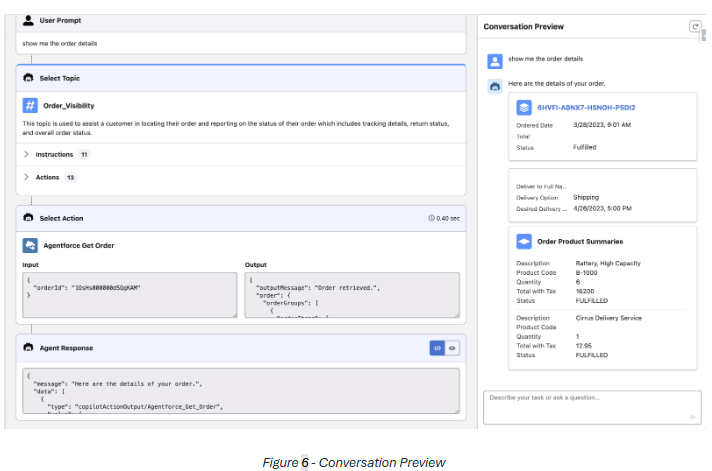
With the action added to the topic, we want to create an instruction that uses the action. A sample instruction is: If a user asks about the details of their order use the "Agentforce Get Order" action to retrieve the details. Now that we added an instruction, we should test the action and verify the results for a few orders. Figure 6 below illustrates a sample conversation that executes the custom action to retrieve the order details.
Conclusion
In conclusion, custom actions can be created from invocable Apex, Flows, or Prompt Builder templates. After you create your action logic, you need to configure the action’s instruction and interface in Agent Studio. Finally, to have an agent use the action, you need to add it to a topic.