Sitecore + Docker - Part 2
In the previous post, I talked about how to spin up a vanilla Sitecore instance using Docker. In this next part, we are going to go over how to push code out to your Docker site, so it can effectively be leveraged for a developer environment. Once we have code pushed out to the environment, I will cover how to debug that code using Visual Studio Remote Debugging. Let's dive in!!
To start, we'll bring back an image from the first post:
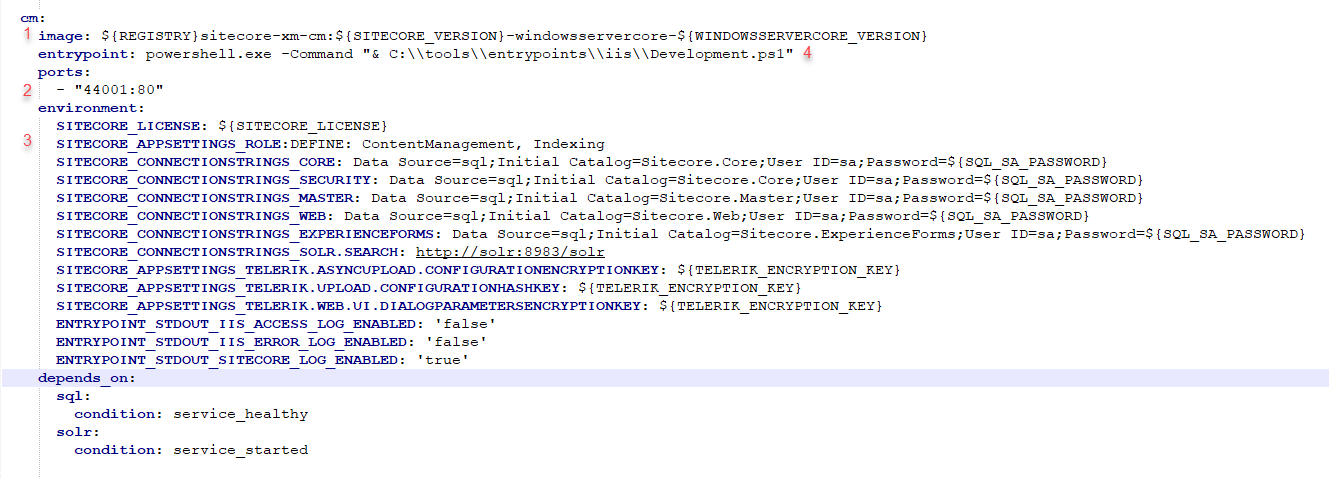
I touched on number 4 being an "entrypoint" script that executes on startup of your container. The Development.ps1 script is included in the Sitecore Docker repository:
{repository root}\\windows\\9.3.0\\sitecore-assets\\tools\\entrypoints\\iis.
This script, along with the other tools, is included in the base 9.3.0 image that gets created for the Sitecore containers:
sitecore-assets:9.3.0-nanoserver-${nanoserver_version} --> {repository root}\windows\9.3.0\sitecore-assets
So, what is it doing? Let's look at the bits that are important for this post:
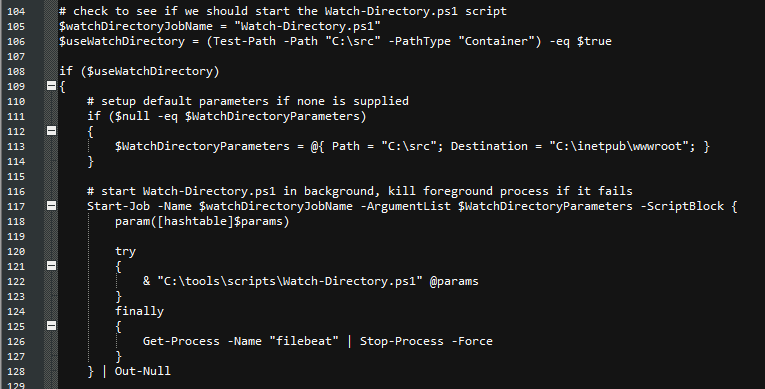
- Line 106 - Look for a directory at C:\src - NOTE: It is looking in the container, not on your machine
- Line 113 - Assuming the directory exists, set up some copy parameters to move files in that directory to the default IIS directory
- Line 117 - 128 - Start a job to continuously monitor that directory for changes. The Watch-Directory.ps1 script is another script that gets added to the container when the image is built.
The Development.ps1 script includes an output message to tell you when the desired (C:\src) directory is not found in the container. If you ran the default compose file to start your container(s), then you will likely see this message in the logs on the Dashboard. To get the appropriate directory in your container, you need to modify your compose file to mount a new volume:

The mounted volume tells the container to look for a "src" folder relative to your docker compose file, and mount those files into the C:\src source of your container. A couple things to note:
- You can use any path (absolute or relative) on your machine to mount to the container.
- If you register the volume without creating the directory, your container will fail to start up.
Once you have the mount in place, any files you put into the newly mounted "src" directory will be automatically copied to the container. Once the files get to the container, the job created by the Development.ps1 script will copy them to the IIS directory for you website.

From here, you just have to configure your publish directory for Visual Studio, and send the code out. Once the code is pushed, you can restart your site to see your changes. Feel like something isn't there? Run this command to get access to the file system via PowerShell, and take a look at what is there:
docker exec -it {name_of_container} powershell
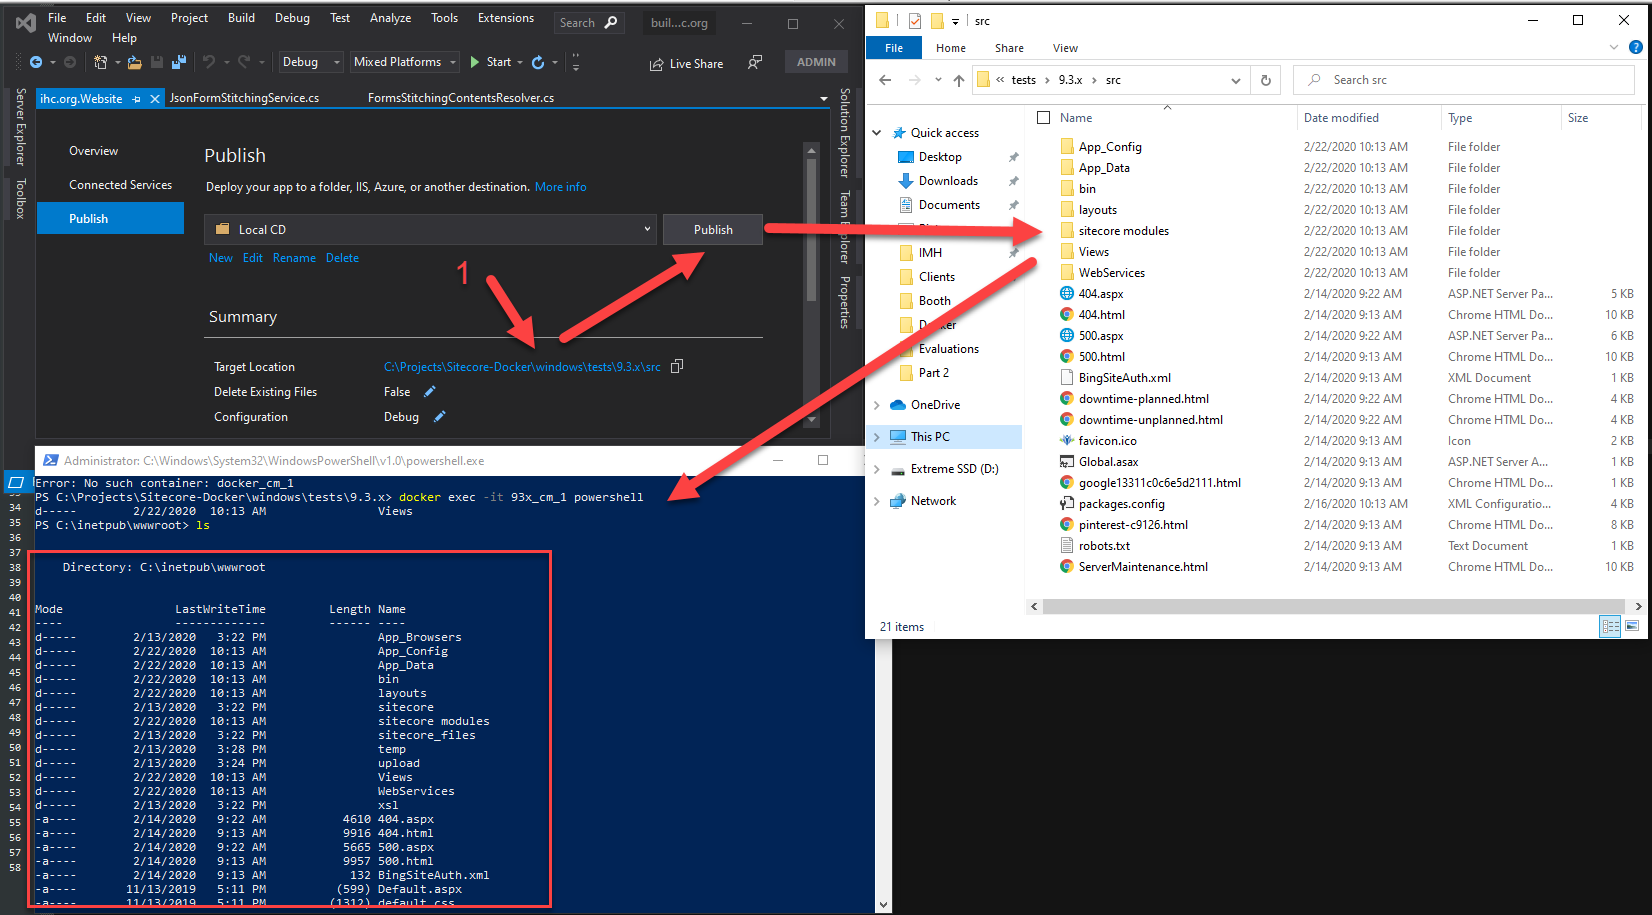
Alright! We have code going to the container. But, what if it doesn't work?!? How do we debug the code, if we can't actually get to the place where it is running? For this, we go back to Development.ps1.

This section of the script is looking for the Visual Studio Remote Debugging tools in your container. If they are present, then it runs said tools and creates a discoverable remote debugging reference. For this section to execute, we simple have to add an additional volume to our container:
- C:\Program Files (x86)\Microsoft Visual Studio\2019\Professional\Common7\IDE\Remote Debugger:C:\remote_debugger
Re-up your container, and you should see a message saying "Started 'msvsmon.exe'". If all is well, you can find the container in Visual Studio.
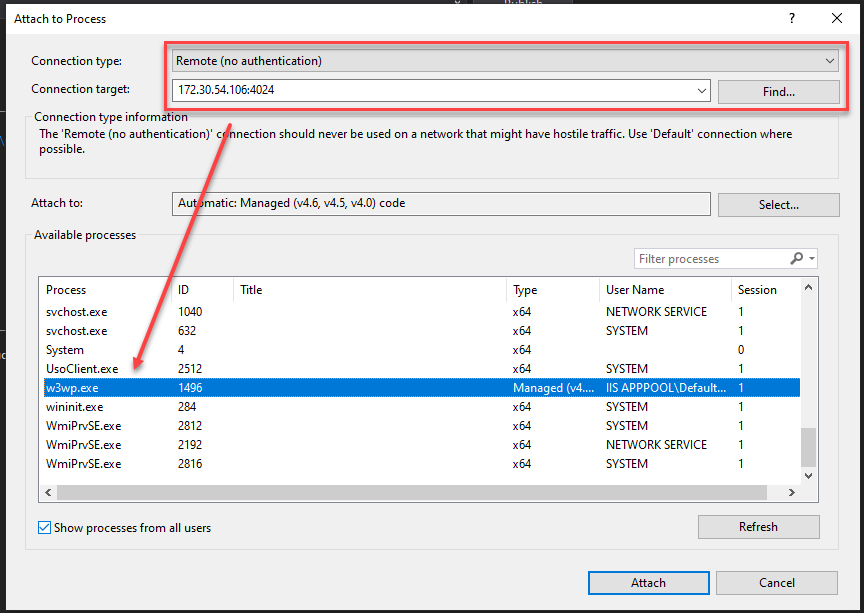
A couple of helpful hints:
- Doing a find for the container never works for me. If you know the IP of your container, you can just type it in with the
port: {ip\_address}:4024
- Don't know the IP address of your container? docker exec into it, and run ipconfig
- Still not able to connect? It's possible that the remote debugging port isn't open. Attempt to run the remote_debugger on your host machine, and it should open it.
- Still no dice 4024 is the port used for Visual Studio 2019. If you're using a different version, then you probably need a different port. Check this out.
That's it. We made it through part two. A lot of pictures and a lot of information. At this point, you should have pretty much everything you need to develop on a basic Sitecore site. But, what if you have a multiple site implementation? Or, if you just don't like going to "localhost:44001"? Or, you need SSL? We can accomplish this, too! Come on back for Part 3, and I can show you how.

