

In this (long) post, I’ll walk through how I built a custom agent designed to keep content current and competitive. The agent provides recommendations to update pages with relevant Sitecore AI references, high-intent keywords, semantic clusters, and Answer Engine Optimization opportunities. The goal is to strengthen relevance, improve search visibility, and increase AI citation readiness. I will first introduce the key concepts in the SitecoreAI Design studio.
I’ll also break down the build process using the standard five-step approach in Agentic Studio’s Workflow Editor. It is a visual, no-code interface that makes it easy to chain actions together, manage variables, and orchestrate AI-powered workflows without writing complex code.
SitecoreAI Agentic Studio has changed how I think about content operations in a composable DXP environment. What used to require manual rewrites and detailed SEO or AEO audits can now be handled by autonomous agents. Instead of constantly reviewing and updating content by hand, we can build agents that analyze, modernize, and optimize Sitecore-specific pages. This ensures they align with the latest Sitecore AI capabilities while also improving visibility in both traditional search and AI-driven answer engines. Here is another blog post where I talk about the agents in SitecoreAI Agentic Studio.
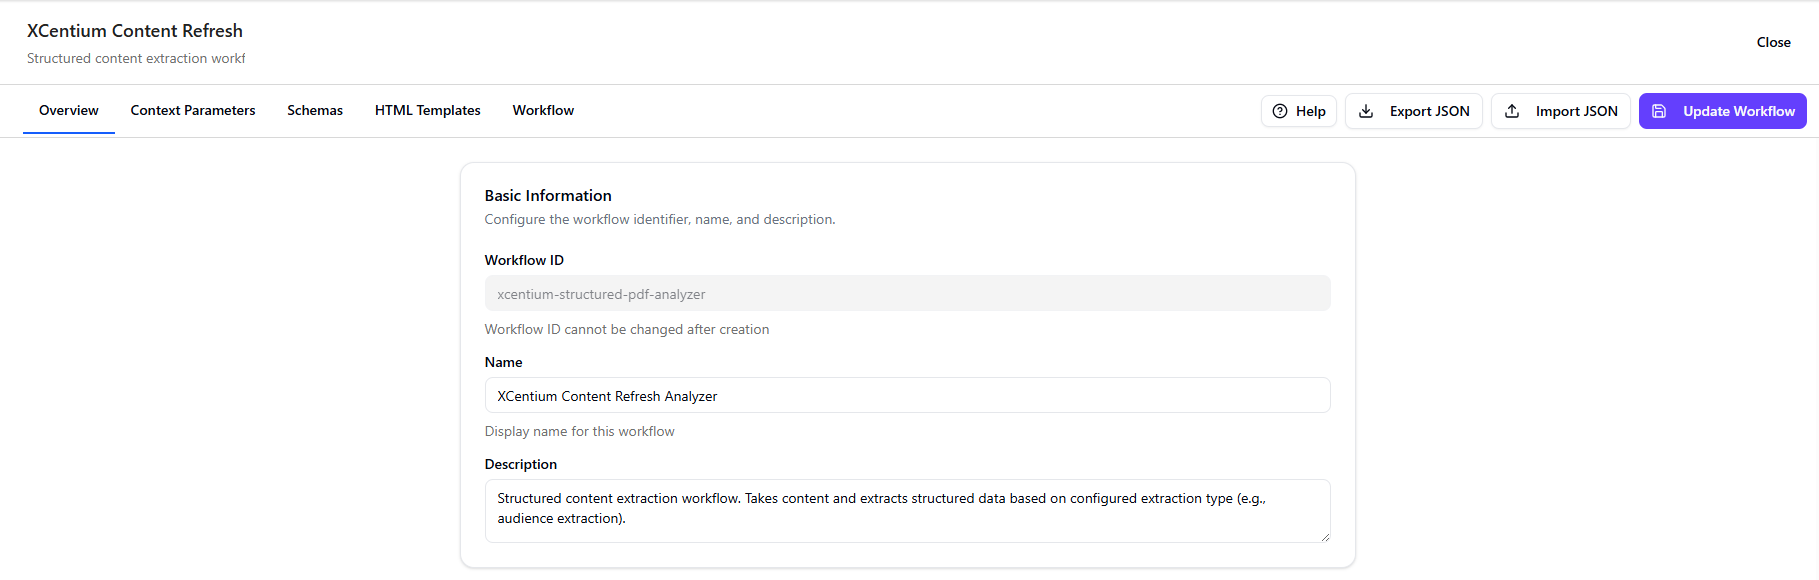
What is the Workflow Editor?
The Workflow Editor is the drag-and-drop canvas inside Agentic Studio where you build custom agents and workflows. You connect actions, which are modular building blocks that handle tasks like prompting language models, extracting data, or saving outputs. These actions run in sequence, passing data through variables along the way.
You can also define context parameters to structure the input, apply schemas to enforce clean JSON output, and use optional HTML templates when you need formatted rendering. It gives you flexibility while keeping the workflow organized and predictable.
Tips: Start simple, test incrementally, use low temperature (0.2–0.4) for factual tasks, descriptive action names, and consistent variable naming.
Actions in the workflow editor are organized into categories based on their purpose:
- Context Parameters
- Extract, validate, and normalize structured data from user input.
- Content Generation
- Create AI-generated content, documents, and messages.
- Research
- Gather information from the web and analyze data.
- Flow Control
- Implement loops, conditions, and dynamic workflow logic.
- Variables
- Store and manage workflow state.
With that foundation, here’s how I built the agent.
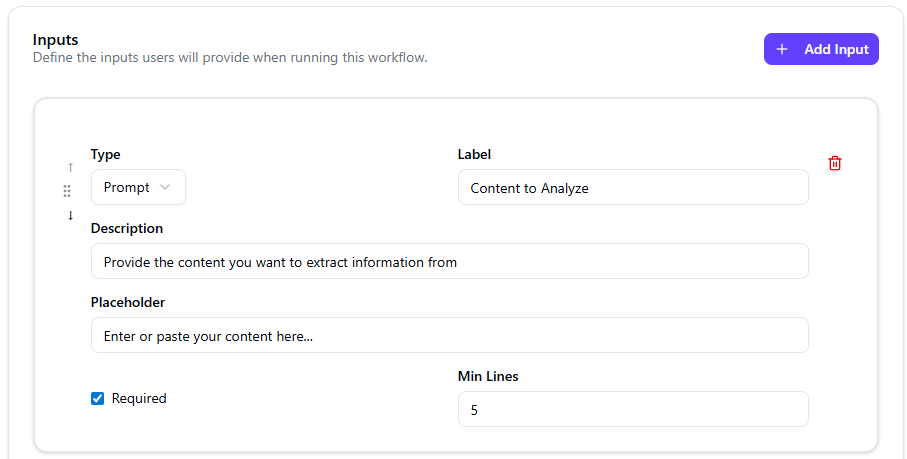
Step 1: Define Your Custom Agent and Input Parameters
Every agent starts by defining how users interact with it. In the Workflow Editor, you configure inputs, the fields shown to users when running the agent.
My agent has three inputs:
- Prompt ("Content to Analyze")
Type: prompt
Required: Yes
Min lines: 5
Description: "Provide the content you want to extract information from"
→ Users paste webpage text, markdown, or raw copy here. - Context ("Ground with context")
Type: context
Required: No
→ Lets users attach existing artifacts or knowledge (e.g., Sitecore AI product docs) for grounding. - File Upload ("Add more context")
Type: file-upload
Required: No
→ Supports PDFs or documents for analysis (e.g., legacy Sitecore XM Cloud pages).
These inputs feed directly into the workflow, making the agent flexible for quick text audits or deep PDF-based modernizations.

Step 2: Define Context Parameters (Optional)
In my case, contextParameters are intentionally empty. I don’t have context to pass. This is useful when you have roles and need to add rules based on the inferred context like channel, target audience, etc. For more advanced agents, you could add parameters here to enforce or extract fields like pageUrl, targetPersona, or competitorUrls.
My custom agent is designed for ad-hoc, content-driven analysis rather than requiring persistent structured extraction (for example always pulling “target audience” or “campaign goal”). User-provided content plus optional files provide sufficient grounding.
Step 3: Define Schema Used in the Agent
Schemas are critical for structured, parseable output especially when integrating with CMS pipelines or downstream tools.
I defined one schema (generate-1760493069816_schema), a detailed JSON Schema object with required properties:
- rewritten_page (Markdown string — the full modernized content)
- sitecore_ai_updates (array of strategic positioning changes)
- updated_sections (array of objects showing XM Cloud → Sitecore AI replacements, with old/new text and reason)
- faqs (array of Q&A showcasing XCentium’s Sitecore AI expertise)
- improvement_explanation (narrative on why the new version is better)
- seo_metadata (title, meta description, keywords, H1/H2 headings, CTAs)
- aeo_geo_seo_recommendations (separate arrays for AEO, GEO, and traditional SEO suggestions)
- ai_citation_readiness (rating High/Medium/Low with strengths and gaps)
- competitive_notes (optional array if competitor URLs provided)
This schema enforces clean, machine-readable JSON output. The agent uses temperature 0.4 in the generation step for factual, consistent results.

Step 4: Define HTML Templates (Optional)
The agent outputs Markdown and structured JSON, which is perfect for copy-paste into XM Cloud or headless rendering. No custom HTML is needed here, but you could add templates for rich previews or email-friendly formats in other agents.
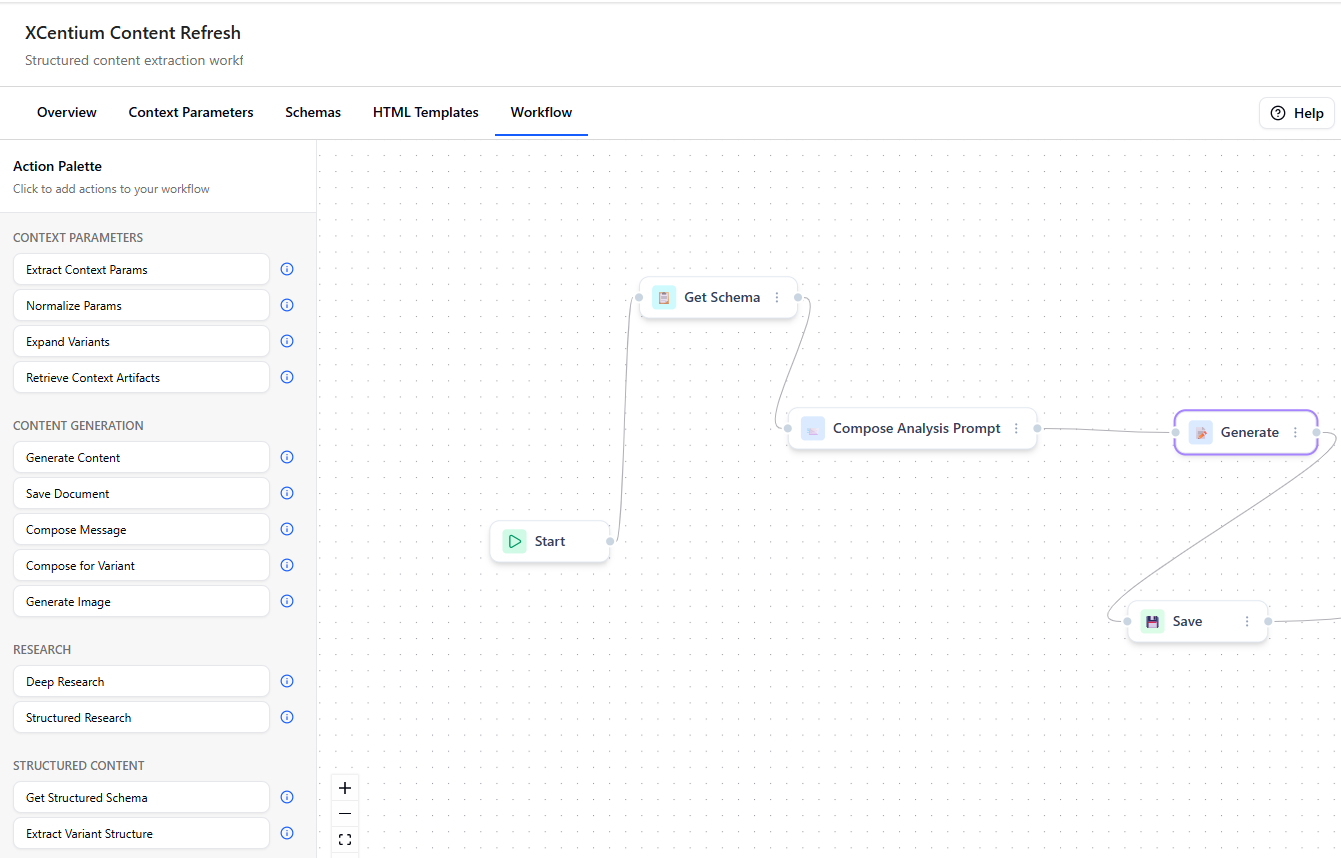
Step 5: Workflow (Putting It All Together)
This is where the magic happens. The actions array defines a clean, linear workflow:
- InitializeFlow ("Initialize") – Bootstraps the workflow and variables.
- GetStructuredSchema ("Get Schema") – Loads the JSON schema and stores it in the structuredSchema variable.
- ComposeMessage ("Compose Analysis Prompt") – Builds the full prompt dynamically.
- System prompt: strict instructions with Markdown output only.
- Message template: instructions to audit content, migrate XM Cloud → Sitecore AI, optimize for AEO/SEO/GEO, generate rewritten content and FAQs.
- Includes {userMessage} input and outputs to generatePrompt.
- GenerateContent ("Generate") — the core LLM step
- Kind: GenerateContent
- Type: JSON
- Model: workflow-fast-model
- Temperature: 0.4
- Input: generatePrompt
- Enforces the schema
- Outputs structured JSON to generatedContent
- SaveDocument ("Save") – Persists the generated content as a Sitecore content item.
- WorkflowEnd ("Complete") – Ends execution cleanly.
The flow is focused and efficient: Input → Prompt composition → Structured generation → Save.
Key Takeaways & Best Practices Applied
- Started simple with a linear workflow.
- Tested incrementally by running individual actions.
- Used descriptive action names for clear logs.
- Maintained low temperature for factual modernization.
- Used consistent variables: generatePrompt → generatedContent → save.
Tip: Minimize research actions to keep the workflow fast.
This agent now runs in minutes and delivers modernized Sitecore AI-focused content with built-in AEO signals, saving hours per page. It’s already helping our team at XCentium maintain thought-leadership pages and client sites.
If you're exploring Agentic Studio, start with the official docs on creating agents and the Workflow Editor.
For marketing teams navigating rapid change, SitecoreAI Agentic Studio provides a practical way to turn complexity into momentum and ensure content remains relevant, discoverable, and credible in an AI-driven world.
If you need any more information, please reach out to me or connect with me on LinkedIn.