Deployment using Vault for Sitecore
Have you ever thought deployments were complicated? Not with Vault. Vault simplifies the process of managing large scale deployments between multiple Sitecore environments.

XCentium s Vault for Sitecore extends Sitecore Experience Management Platform to allow Enterprise Architects, IT Teams and Content Authors to version, archive, track and report on all content related events. Additionally, Vault also allows IT Teams to easily track and manager what content is deployed on which server/environment in large distributed Sitecore environments.
In this blog post, let's discuss on how to use the Deployment feature using Vault.
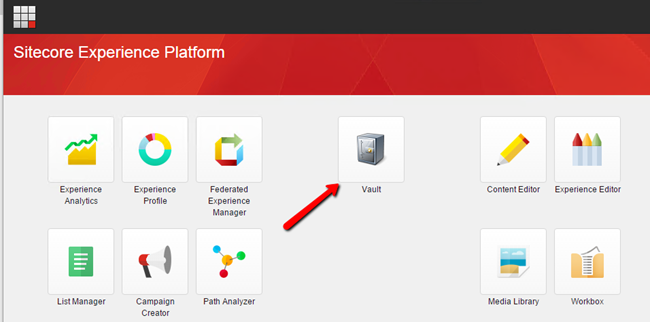
Login to Sitecore and select Vault from the Launch Pad.
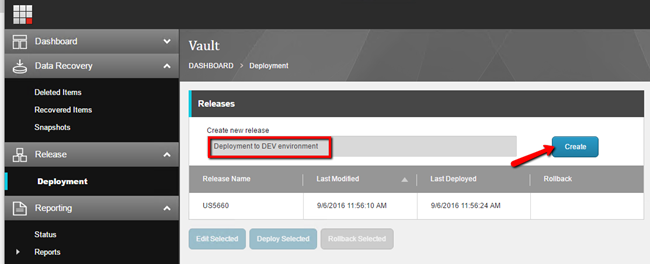
Now, you will be in the Vault Dashboard. Select Deployment, and Create new release.
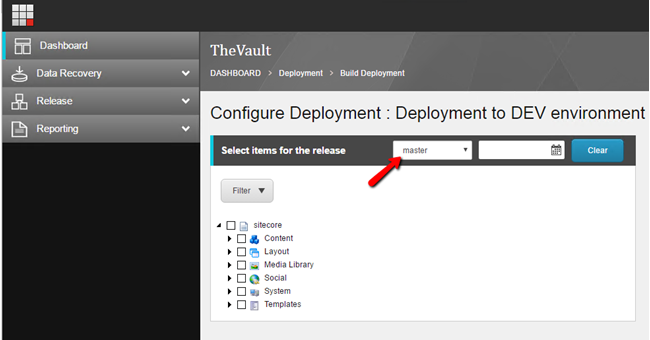
Once the release has been created, we will Configure the Deployment by selecting the items you wish to promote to the development environment.
Step 1: Select the database which contains the items you wish to promote (Default: master)
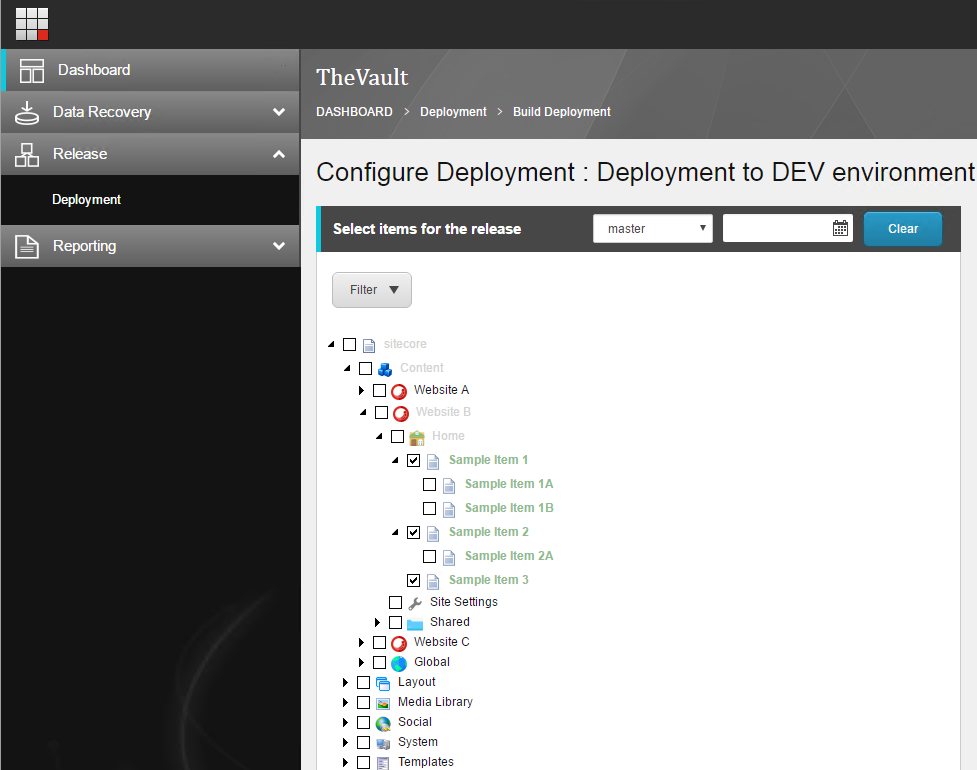
Step 2: Navigate to the section under which your items are present. (For Example: Sitecore/Content)
Step 3: Select the items by using the checkbox next to each item as shown below.
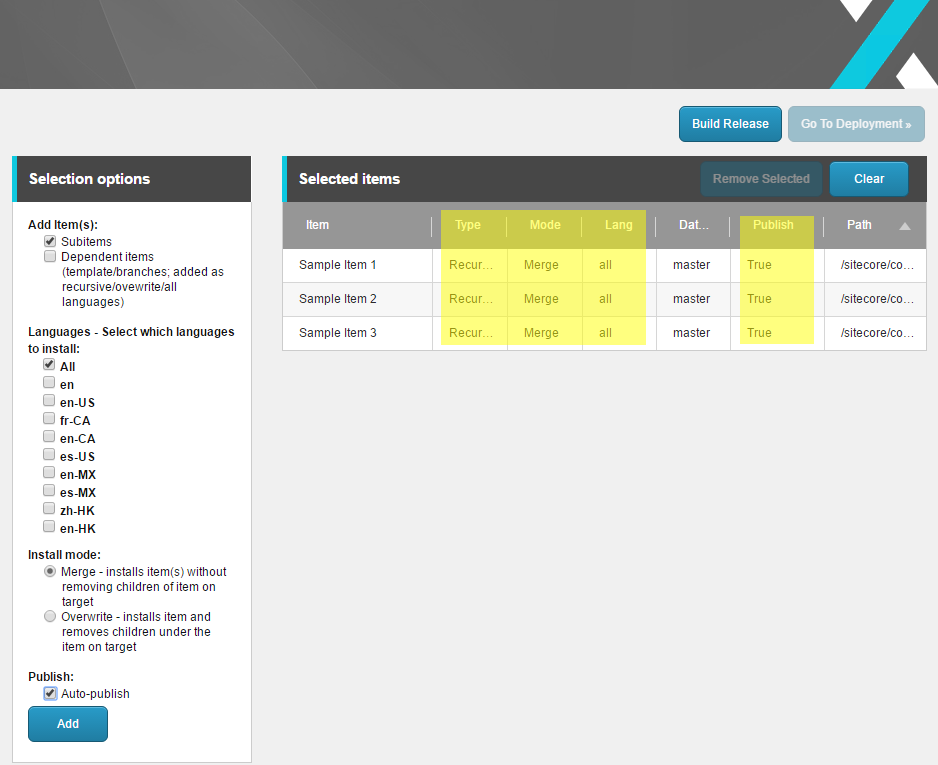
Step 4: Once the items are selected, you can customize them under Selection options
Step 5: There are options whether to
- Add Item(s): Include Subitems
- Dependent Items
- Language(s): Select which language versions need to be deployed
- Install Mode: Merge
- Overwrite
- Publish: Auto-Publish: Enabling this will automatically deploy the items to master database of the Target environment followed by publishing them to the web database.
Step 6: Click on Add. You will notice the list view is populated based on your selection.
Highlighted in yellow, you will notice that
- with Subitems selected, I will see my items use Recursive Type_._
- Install Mode set to Merge
- Languages set to All
- Auto-Publish set to True
Step 7: Build Release.
Step 8: Go to Deployment
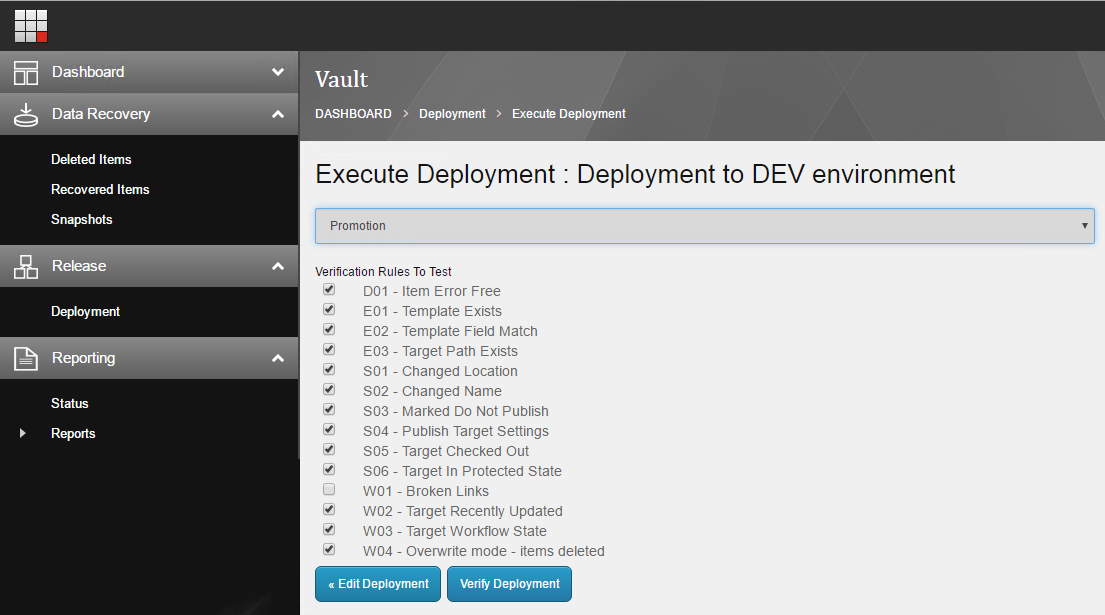
Step 9: You are now in the step of Executing the Deployment. Select your Target. As you can notice, your development environment in already configured to use the name Promotion
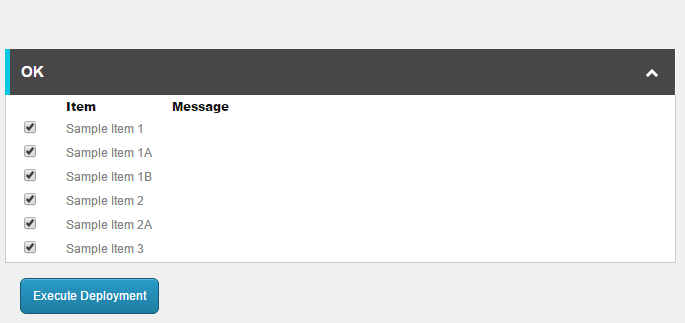
Step 10: Once you have clicked on Verify Deployment, Vault will process all the Verification Rules to Test and gives a confirmation to proceed with the execution.
Clicking on Execute Deployment will finish the deployment. You can verify your changes by going to the Target Environment.
This article used Vault for Sitecore on Sitecore 8.1 Update-3.


