Sitecore 9 makes it really easy to incorporate federated authentication into the admin panel. A large portion of the process simply involves a few configuration changes. Included as a part of these configurations are the group-to-role transformation mapping. The ease of these changes are nice, however adding a new role requires configuration changes, which means a deployment or (at the very least) an outage of the site. I recently incorporated federated authentication (via Okta) into a system, and was irked by this requirement. This subsequently drove me to add some logic to allow the group-to-role mappings to be configured within Sitecore.
The process for implementing federated authentication is pretty well outlined in the Sitecore 9 documentation, which can be found here.
Even more useful, josedbaesz has an excellent post on how to configure Okta Federated Authentication in Sitecore 9: . There are few small tweaks to his post that I had to make to fit my needs:
- Add an additional scope to retrieve the list of assigned groups
private const string OpenIdScope = OpenIdConnectScope.OpenIdProfile + " email groups";
- In the ProcessAuthorizationCodeReceived method, we get and add the groups as claims on the identity.
    private async Task ProcessAuthorizationCodeReceived(AuthorizationCodeReceivedNotification notification)

    {

    // ...

    var claimsIdentity = new ClaimsIdentity(userInfoResponse.Claims, notification.AuthenticationTicket.Identity.AuthenticationType);

    var groups = claimsIdentity.FindAll("groups");

    claims.AddRange(groups.Select(group => new Claim(group.Value.ToLowerInvariant(), group.Value.ToLowerInvariant())));

    SetRoleTransformations();

    // ...

    }
- SetRoleTransformations is the method used to read the role mappings from Sitecore. This method iterates over each of the mapping items defined in Sitecore, and adds the transformations to the identity.
    public virtual void SetRoleTransformations()

    {

    var rootTransformationItem = Context.Database.GetItem(Settings.GetSetting(Constants.Settings.RoleTransformationsRootItemId));

    if (rootTransformationItem == null)

    {

    return;

    }

    var transformations = rootTransformationItem.Children.Where(rti => rti.IsDerived(Templates.OktaRoleTransformation.Id)).ToList();

    foreach (var transformation in transformations)

    {

    var roleTransformation = new DefaultTransformation();

    var source = transformation.Fields[Templates.OktaRoleTransformation.Fields.OktaGroup].Value.ToLowerInvariant();

    var targetRole = transformation.Fields[Templates.OktaRoleTransformation.Fields.SitecoreRole].Value;

    roleTransformation.Source.Add(new ClaimInfo(source, source));

    roleTransformation.Target.Add(new ClaimInfo(RoleClaimType, targetRole));

    IdentityProvider.Transformations.Add(roleTransformation);

    }

    }
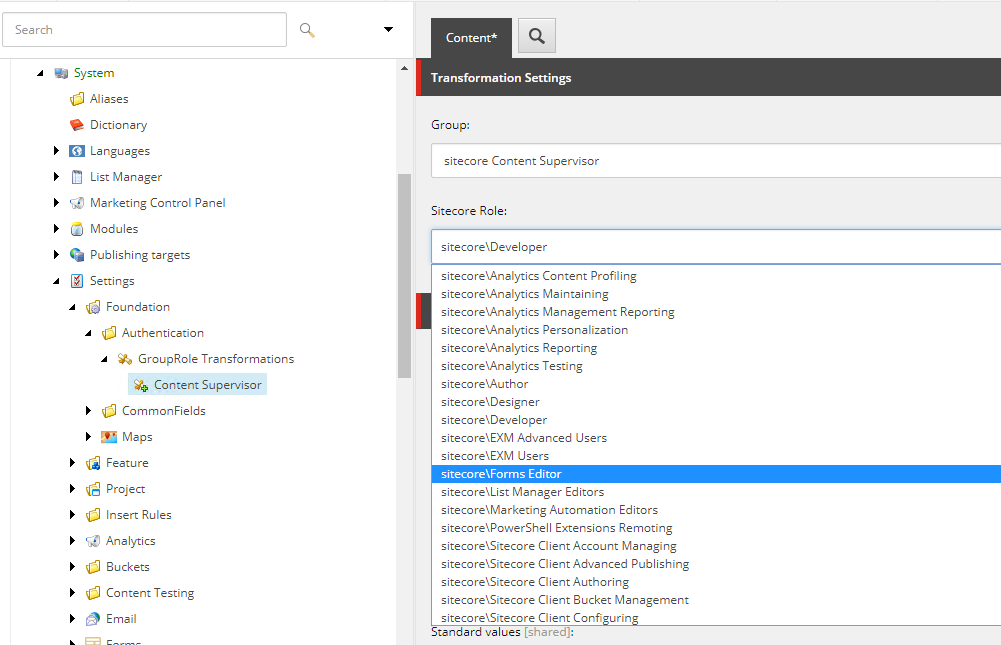
Creating the group-to-role map items in Sitecore only requires a custom drop list field, and some basic templates. The custom drop list field extends a standard drop list, setting the values from a list of the available roles in the system.
public class RolesDropList : LookupEx

{

protected override void DoRender(HtmlTextWriter output)

{

Assert.ArgumentNotNull(output, "output");

var values = GetValueList();

output.Write($"{GetControlAttributes()}>");

output.Write("
"
);

var valueExistsInList = false;

foreach (var value in values)

{

if (IsSelected(value))

valueExistsInList = true;

output.Write($"
{(IsSelected(value) ? "selected='selected'" : string.Empty)}>{value}"
);

}

var valueNotInSelection = !string.IsNullOrEmpty(Value) && !valueExistsInList;

if (valueNotInSelection)

{

output.Write($"
"
);

output.Write($"
{Value}"
);

output.Write($"");

}

output.Write("");

if (valueNotInSelection)

output.Write($"
{Translate.Text("The field contains a value that is not in the selection list.")}
");

}

private bool IsSelected(string value)

{

Assert.ArgumentNotNull(value, "value");

return Value == value;

}

private static IEnumerablestring> GetValueList()

{

var roles = RolesInRolesManager.GetAllRoles();

return roles.Select(r => r.Name).ToArray();

}

}
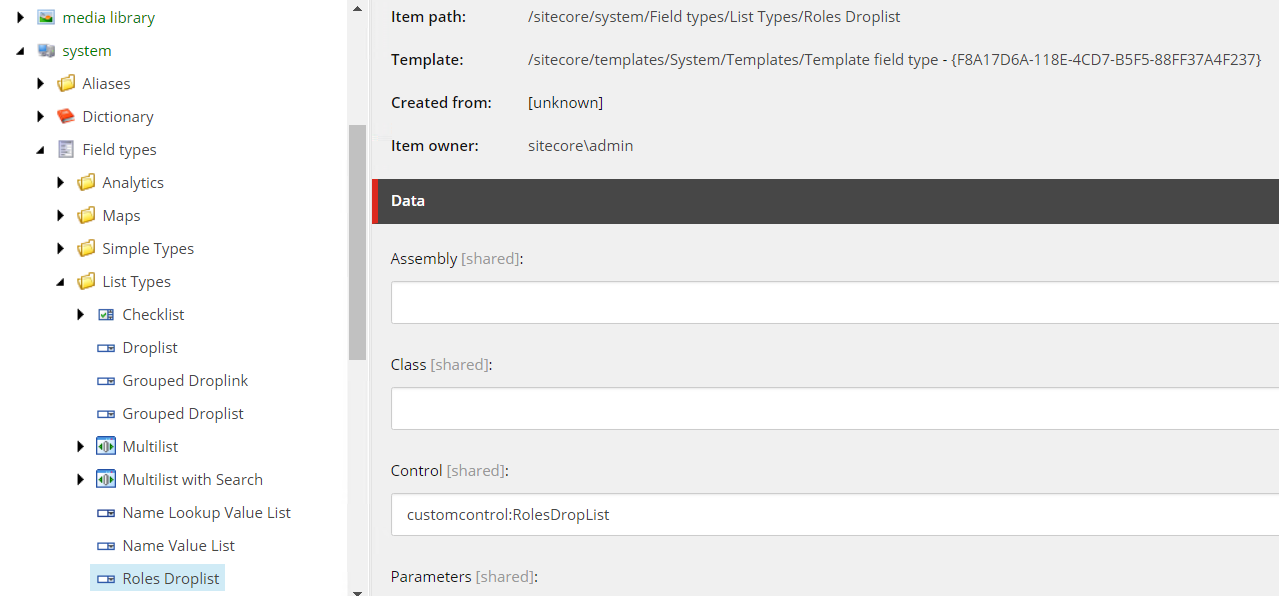
This new field is added to the list of available templates fields by registering the control in a config file, and adding the field to the core database:
"[http://www.sitecore.net/xmlconfig/](http://www.sitecore.net/xmlconfig/)" xmlns:env="[http://www.sitecore.net/xmlconfig/](http://www.sitecore.net/xmlconfig/)" xmlns:role="[http://www.sitecore.net/xmlconfig/](http://www.sitecore.net/xmlconfig/)">


"on" namespace="Foundation.Authentication.Fields" assembly="Foundation.Authentication" prefix="customcontrol"/>
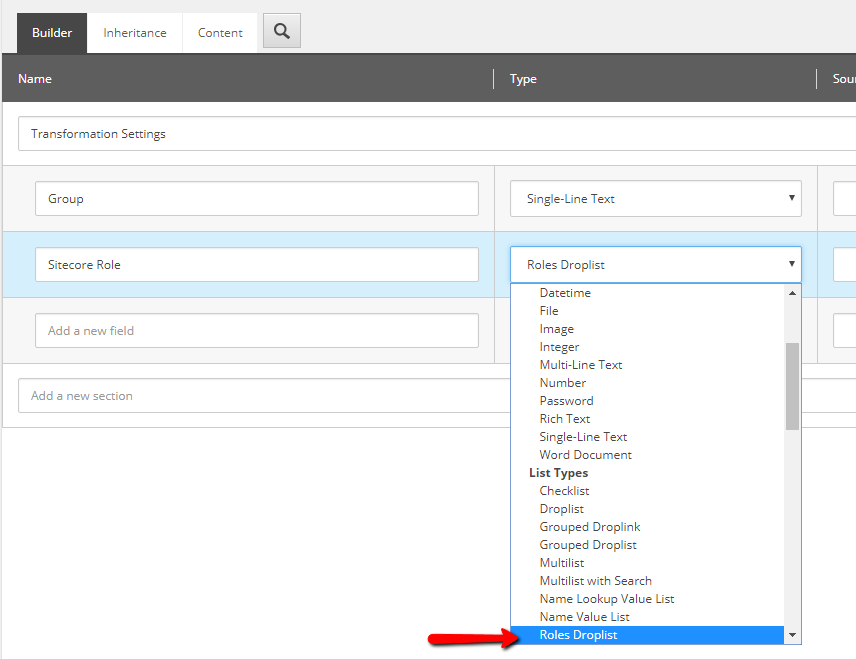
Once the new field type is registered, we can use that to create mapping template, and then the mappings.
Now I no longer need to go into a configuration file to add support for a new role and security configuration coming out of Okta. This allows me to apply new security to the application quickly and easily, without needing a code deployment or application restart. The original transformations via the configuration file will also still work with this implementation. The items being added from Sitecore are in addition to anything that configured. The configuration file is still needed to map claims that are used programmatically, such as the FullName claim.


