

Many a times, for comparison purposes, you might wish to have the old JSS SDK site to be still available, to be able to compare with new upgraded content sdk components. This will be super useful to test Sitecore "Page Builder" and "Design Studio" (only available after content SDK upgrade). You do not have to create a new "project" in XM cloud, for this upgraded content SDK site. I will explain below on how you can have both JSS and Content SDK co-exist side by side.
1- Within your nextjs application, create a copy of existing JSS site (e.g. "myJSSSite" and call it say "myContentSDKSite").
2- Upgrade all the components within this new site ("myContentSDKSite") to use sitecore content SDK.
3- Open the "xmcloud.build.json" file and add the entry for this new internal rendering host, that will render this new site:
 "ContentSDKInternalRH": {
 "path": "./src/Rendering/sites/myContentSDKSite",
 "nodeVersion": "22.22.0",
 "enabled": true,
 "type": "sxa",
 "buildCommand": "buildContentSDK",
 "runCommand": "next:start"
 }
4- Note the "buildCommand", that should be defined within the "package.json" of this new content SDK site "myContentSDKSite" like:
"buildContentSDK": "cross-env SITECORE_SITE_NAME=ContentSDKSite npm-run-all --serial bootstrap next:build"
5- Now, you can deploy these changes. After a deployment, you can now see your new internal rendering host entry "ContentSDKInternalRH", under "/sitecore/system/Settings/Services/Rendering Hosts" in Sitecore content editor.
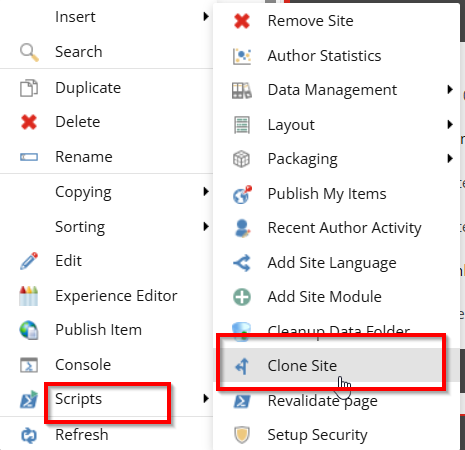
6- Open XM cloud sitecore content editor and clone your existing site to create a new one like "ContentSDKSite" (as you have it in your content SDK site's "package.json" file, shown in step 4):
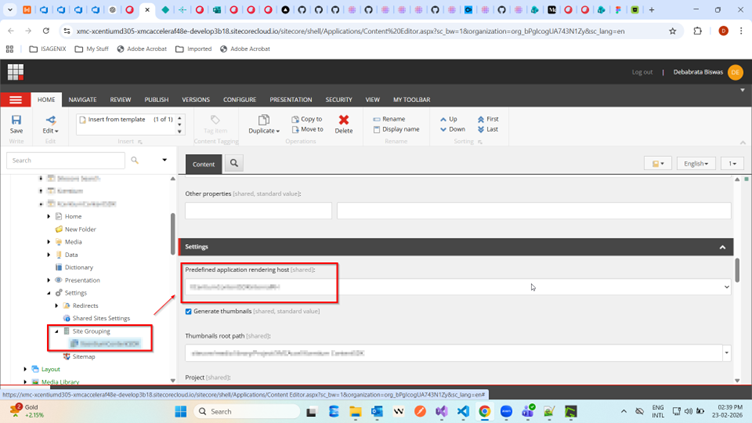
7- Once cloning is complete, you can go to the site settings for this new cloned site and select the new rendering host (e.g. "ContentSDKInternalRH") you earlier created, for this new cloned site.
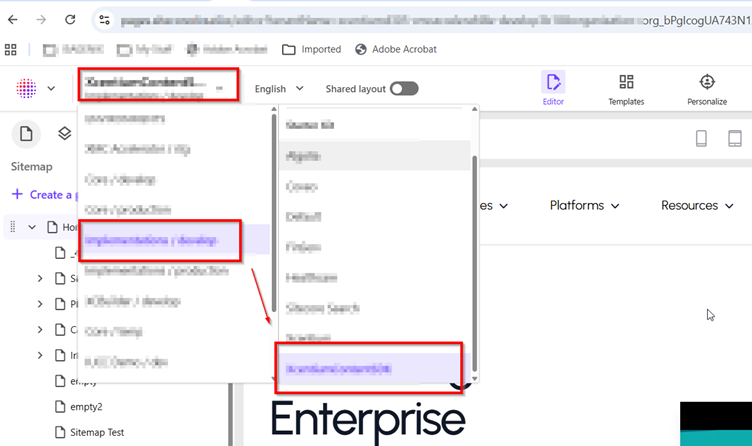
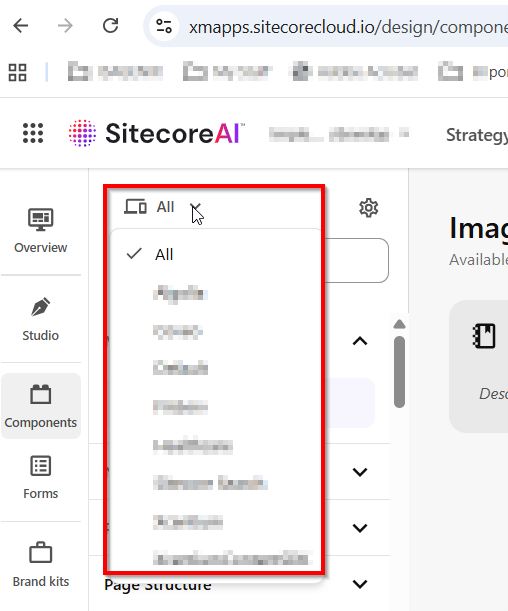
8- Now you should be able to open Sitecore AI "Page Builder" and "Design Studio", select the cloned site from the drop downs (that now uses content SDK internal rendering host), to check out your content SDK upgraded components.
Page Builder:
Design Studio:
9- Additionally, you can create and configure your Vercel/Netlify hosted site to point to this content SDK site, to see the front-end site in action.
Reference:
A big shout out to my friend/guide Kevin Melendez (kevin.melendez@xcentium.com), for his help on this effort.