

Content migration is one of the most complex phases of any Sitecore modernization effort. SitecoreAI Pathway introduces AI-assisted tooling that helps analyze legacy XM/XP implementations and rebuild content within SitecoreAI. While the platform provides intelligent template and component mapping, successful migrations still require careful preparation, validation, and execution.
This guide provides a step-by-step walkthrough of the complete Pathway migration process, including target and source extraction, AI-assisted grouping and mapping, and final migration execution. It focuses on the practical implementation details, file preparation, and validation steps developers need to successfully migrate content.
For a conceptual overview of Pathway’s architecture and value, refer to this article.
Step 1: Migration Creation and Configuration
Before starting a Pathway migration, you must ensure you have met all prerequisite requirements.
Prerequisites
- Source is Sitecore XM/XP
- Sitecore AI target site has been created
- Templates, renderings, page designs, and partial designs have all been created in the target
- Pathway App has been installed (marketplace app available to Sitecore 360 subscribers)
Once these are met, you can begin your migration. Open the Pathway app in SitecoreAI and click on “New Migration.” On the next screen, add the name and description for the migration. These should clearly identify the site and language you are migrating. Click “Next” to proceed.
On the next screen, enter the target environment and site details in the first column.
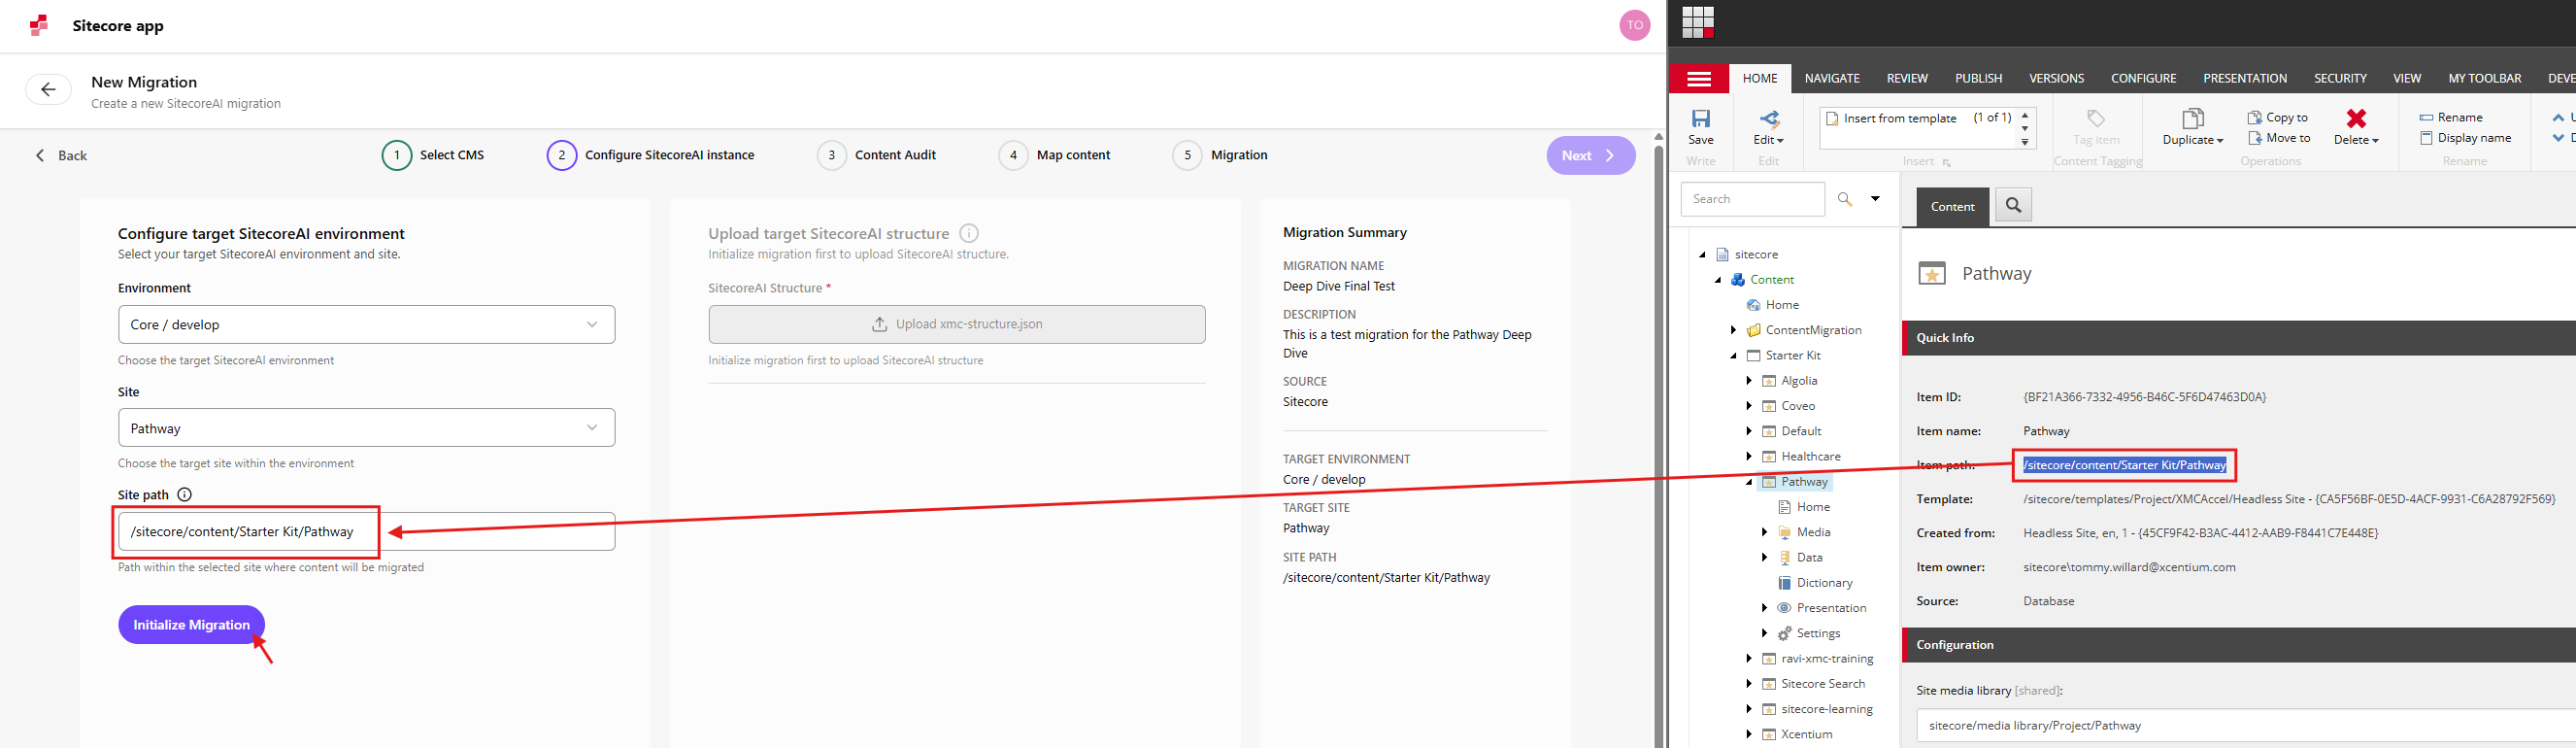
Click “Initialize Migration.” A success message should appear and an “Upload URL” will be generated in the middle column. This will be used later during Source Data Extraction.
Step 2: Target Data Extraction
Navigate to the Pathway Dashboard and click on “Show Info” at the top right of the page. Scroll down until you see two download buttons. Download the zip package next to “Analyze SitecoreAI project.” After extracting it, you will see the following files:
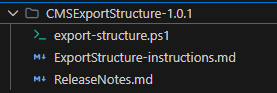
Follow the included instructions. The exporter looks for GUID-based folders with the standard serialization structure: {GUID}/en/<version>/xml.
To achieve this structure, create Sitecore packages containing:
- Templates (page and component)
- Renderings
- Page designs and partial designs
After creating the packages, extract them and organize the files according to the instructions. Ensure the extracted files are placed in the same directory as the export-structure.ps1 script.
Components
- Extract the serialization package zip file and locate the items folder
- Create a new Components folder in the same directory as the export script
- Copy the items folder into the new Components folder

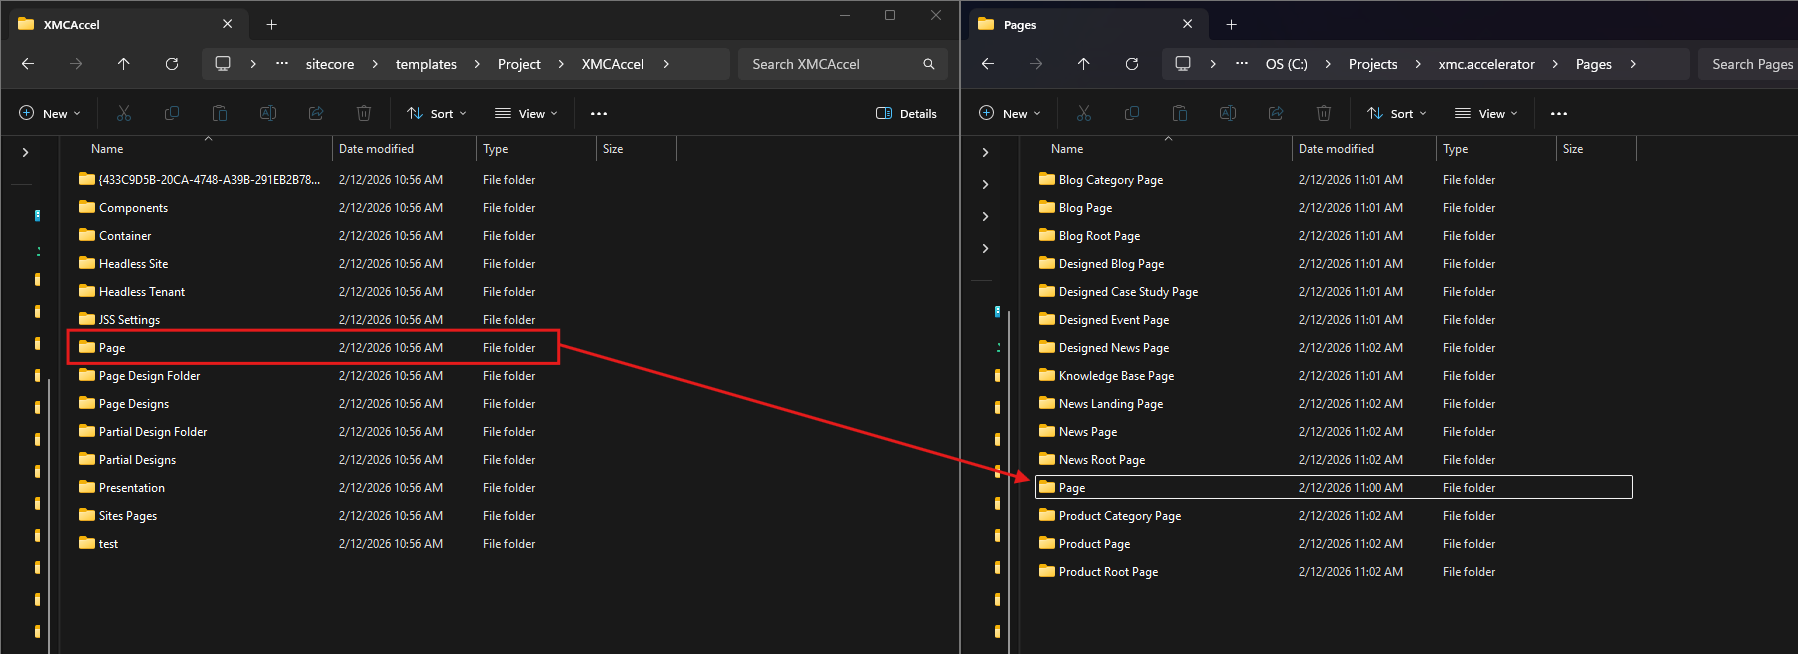
Pages
- Extract the serialization package zip file and locate the page templates
- Create a new Pages folder in the same directory as the export script
- Copy each individual template folder directly into the Pages folder
Page and Partial Designs
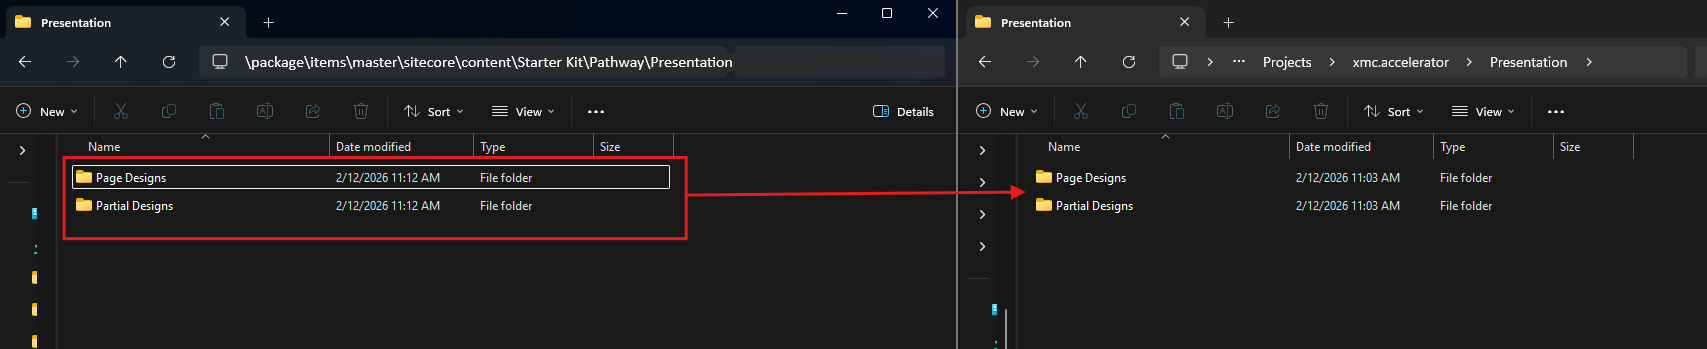
- Extract the serialization package zip file
- Locate items/master/sitecore/content/<project>/<site>/Presentation
- Create a Presentation folder beside the export script
- Copy the extracted Presentation folder contents into the new folder
Renderings
- Extract the serialization package zip file
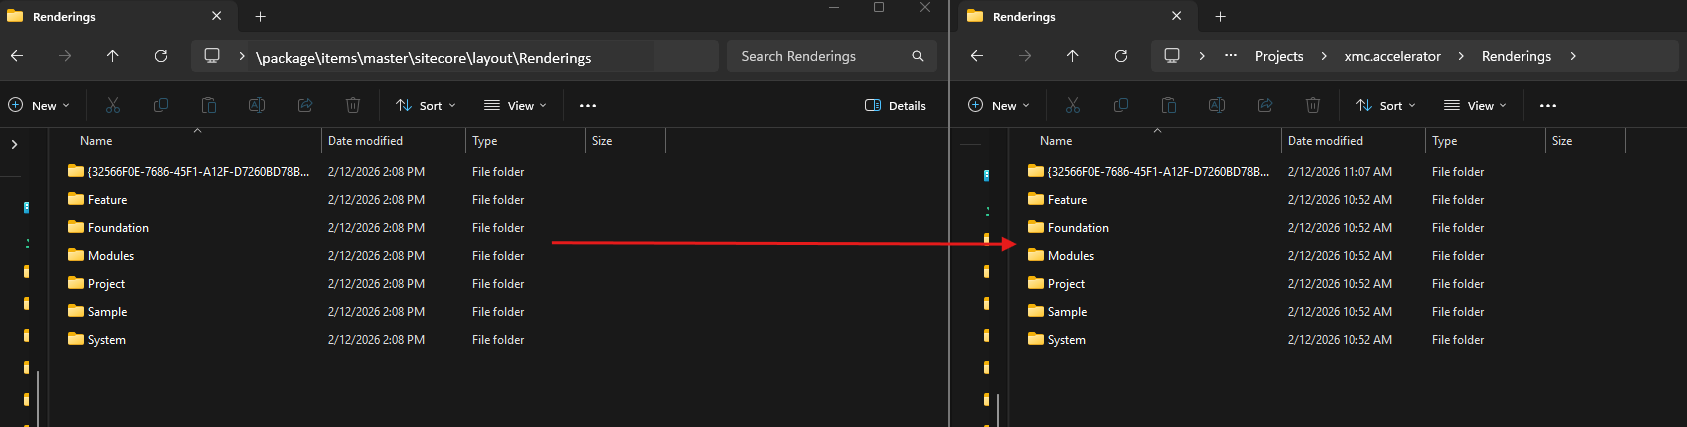
- Locate items/master/sitecore/layout/Renderings
- Create a Renderings folder beside the export script
- Copy the entire contents into the new Renderings folder
After preparing the data, execute the export-structure.ps1 script. The console will display logs identifying successes and failures as the script runs.

The generated xmc-structure.json file contains several top-level arrays describing pages, renderings, page design mappings, and page design structures.
- Pages: One entry per page template with simplified field metadata
- Renderings: Rendering definitions with datasource template and parameters
- PageDesignMappings: Pairs of templateId and pageDesignId
- PageDesigns: Page designs with partial designs and parsed renderings
The JSON output is also written to the console. Because it may be extremely large, you may want to remove the console output section from the script.

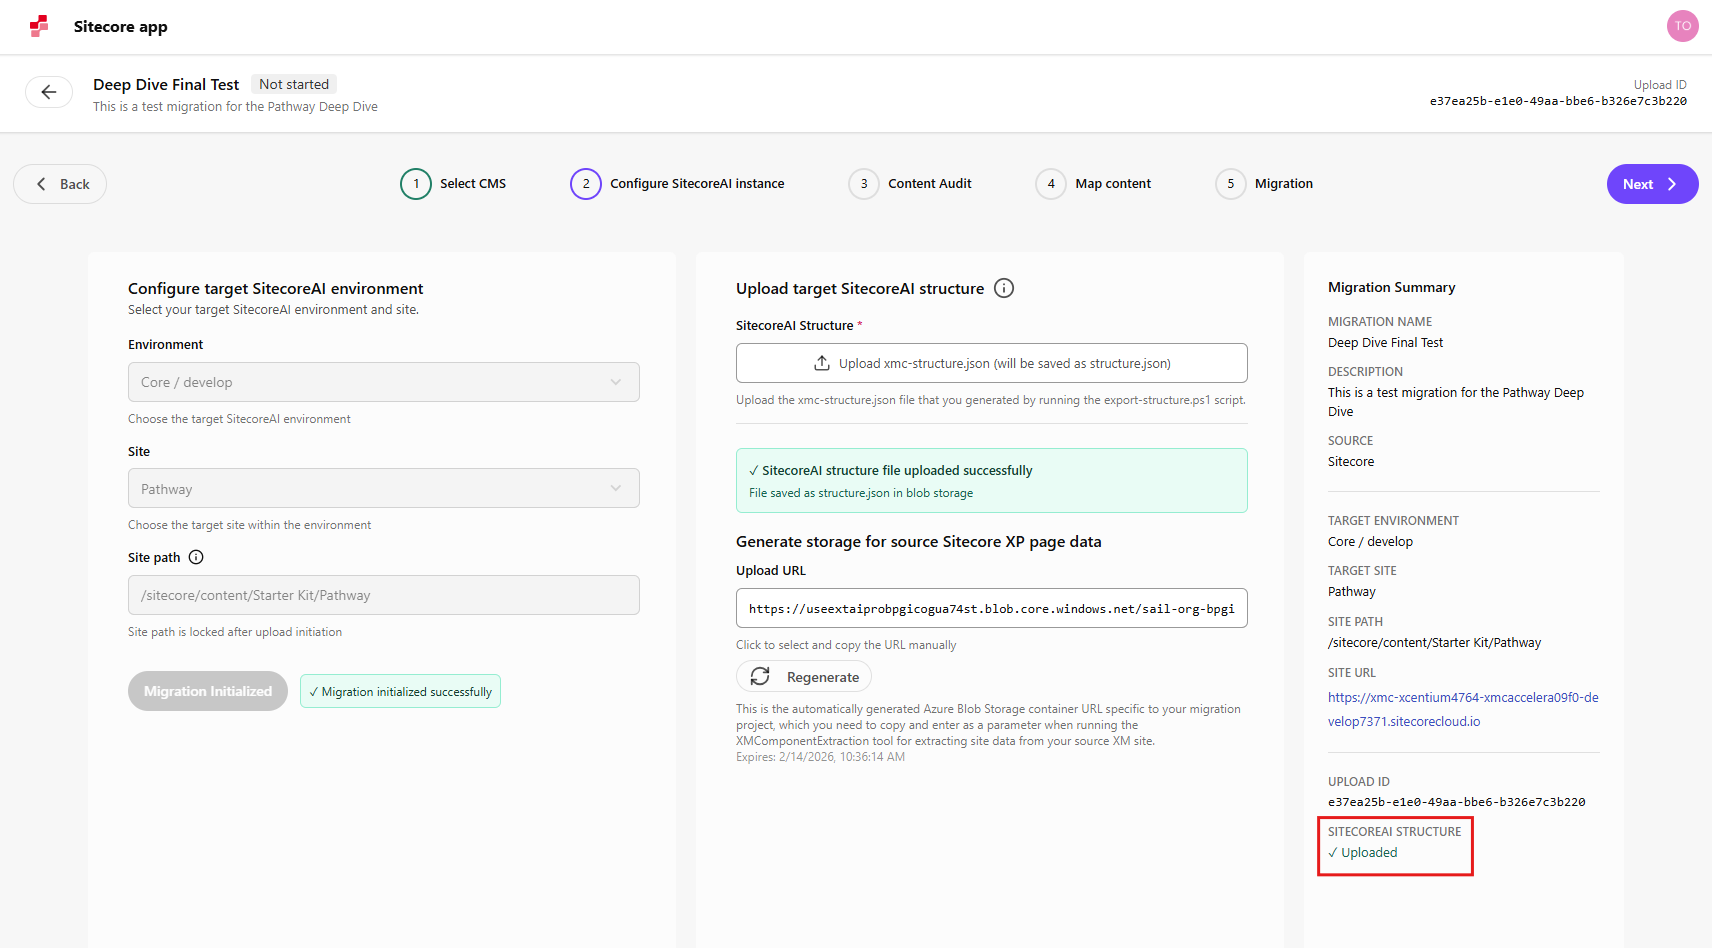
Once validated, upload the xmc-structure.json file back into Pathway. A successful upload will display a new status labeled Uploaded – SITECOREAI STRUCTURE.
Step 3: Source Data Extraction
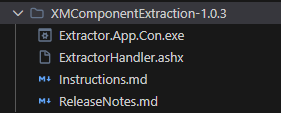
Return to the Pathway Dashboard and download the package labeled “Scan your XM instance.” After extracting the files, you will see the following:
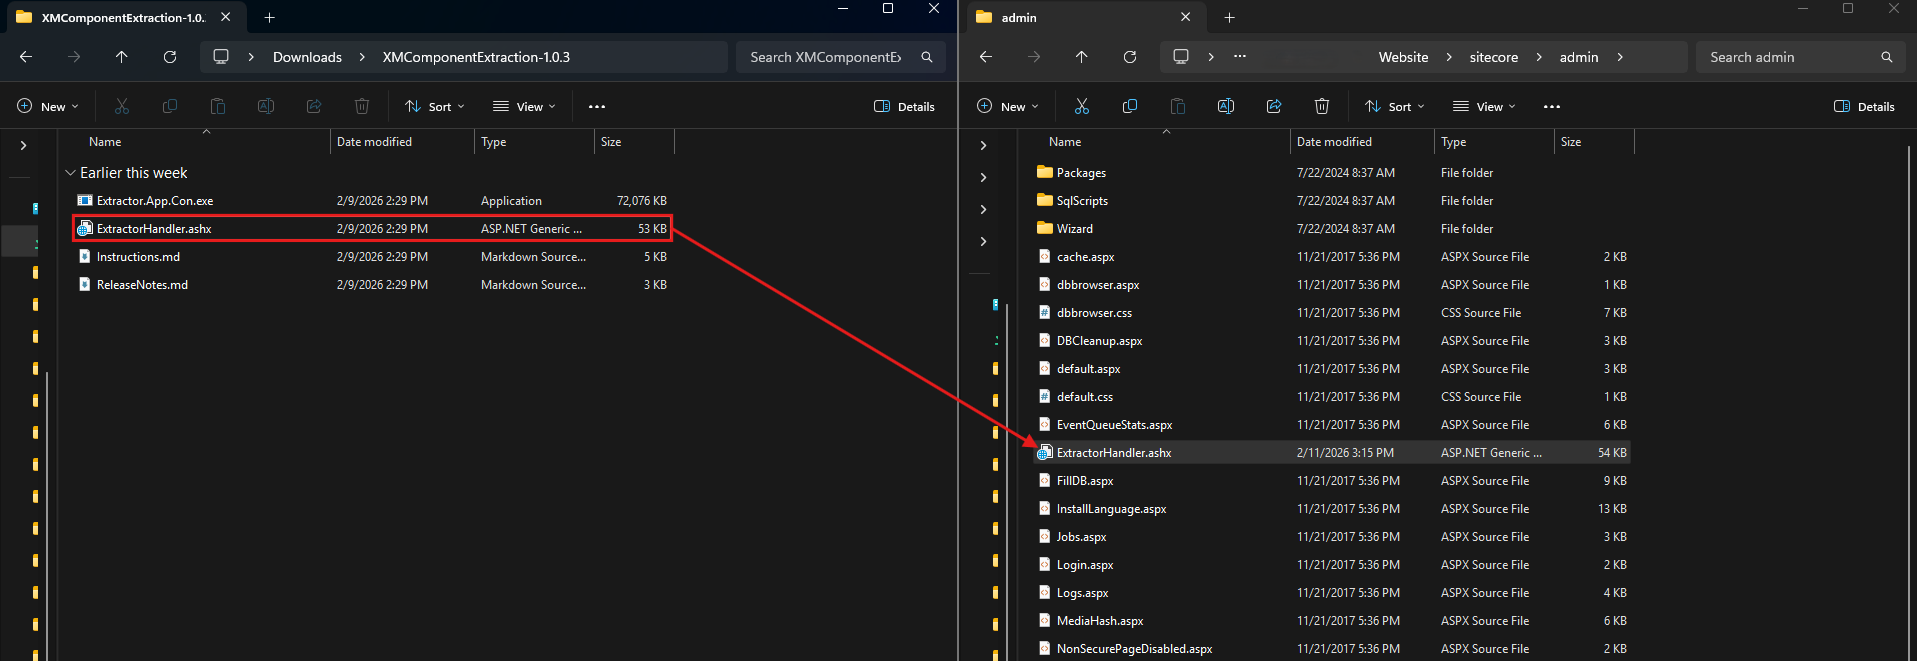
Add ExtractorHandler.ashx to your source CM server under wwwroot/sitecore/admin.
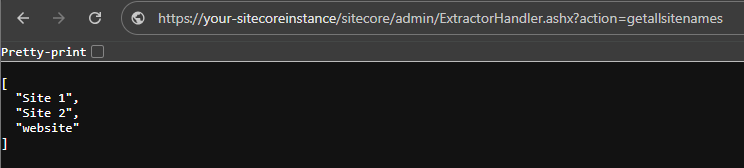
To verify installation, visit:
https://your-sitecoreinstance/sitecore/admin/ExtractorHandler.ashx?action=getallsitenames
You should receive a list of sites from your Sitecore instance.
Next, update the setting Sitecore.Services.SecurityPolicy in:
.\App_Config\Sitecore\Services.Client\Sitecore.Services.Client.config
Set the value to:
Sitecore.Services.Infrastructure.Web.Http.Security.ServicesOnPolicy
This grants access to Entity and Item Services and can be reverted after extraction.
Developer Tip
To inspect extractor JSON output, add a custom log function in ExtractorHandler.ashx and log the pageObject at the end of the ParseHTML function.
Step 4: Page Grouping
After both source and target data have been extracted, Pathway can begin AI analysis. Click the Grouping button to allow Pathway to automatically group pages from the source site.
Once grouping is complete, select Template Mapping to match page groups with target page templates. You can review the mapping details to see the reasoning behind the AI decisions.
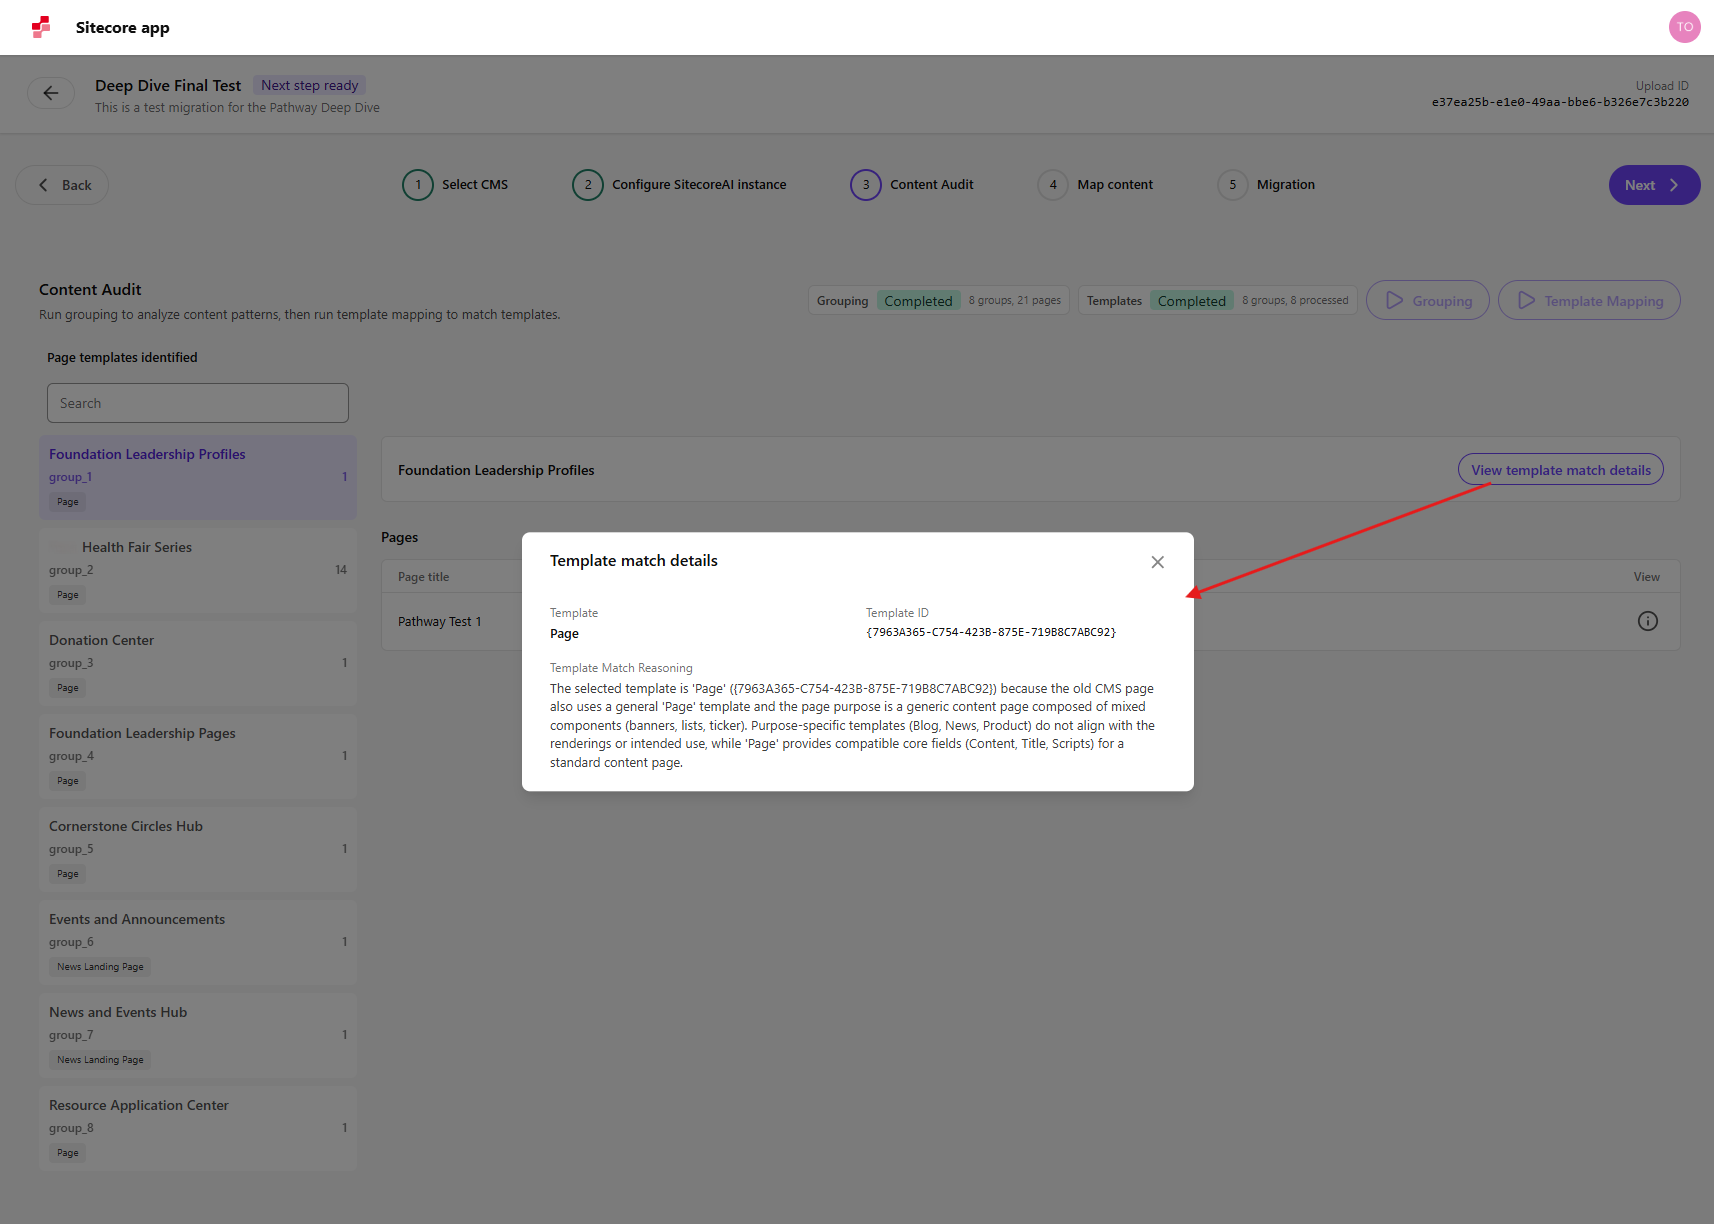
- Assigned template from the target site
- Template item ID
- AI reasoning behind the mapping decision
Step 5: Component Mapping
Click Component Mapping to map components from the source site to component templates in the target environment.
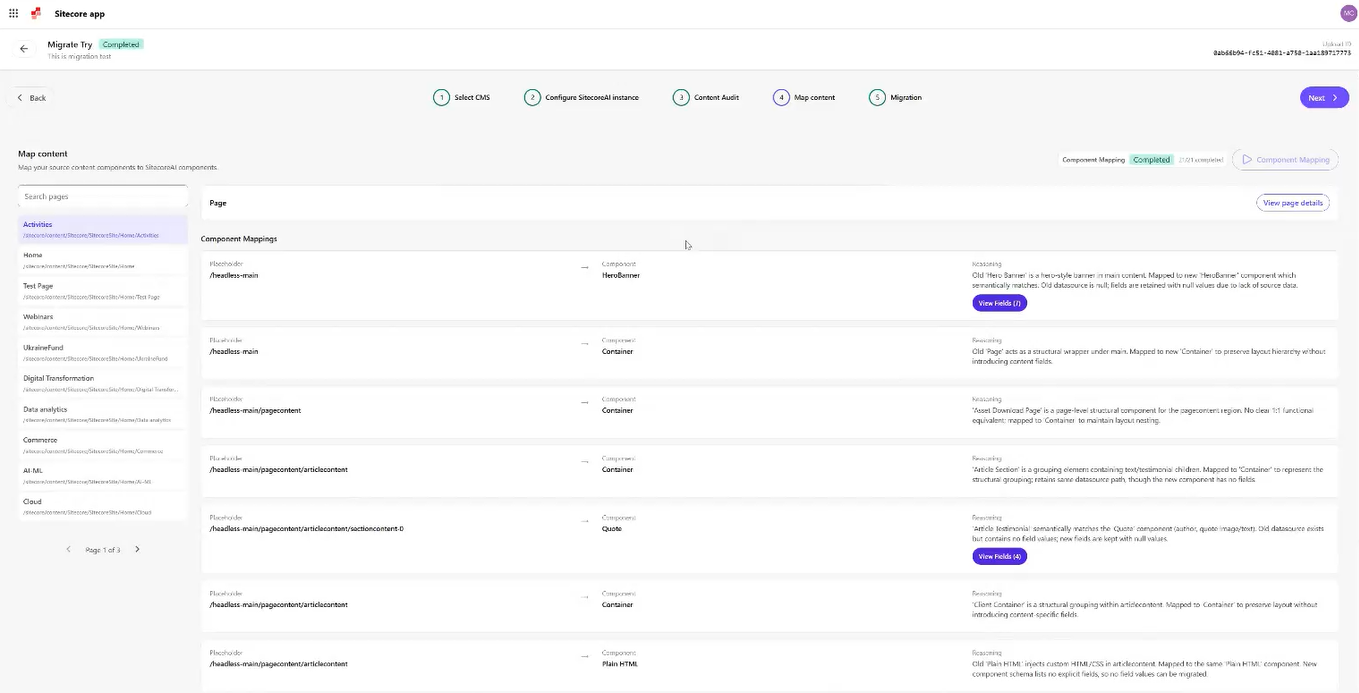
- Target placeholder
- Target component
- AI explanation for the mapping
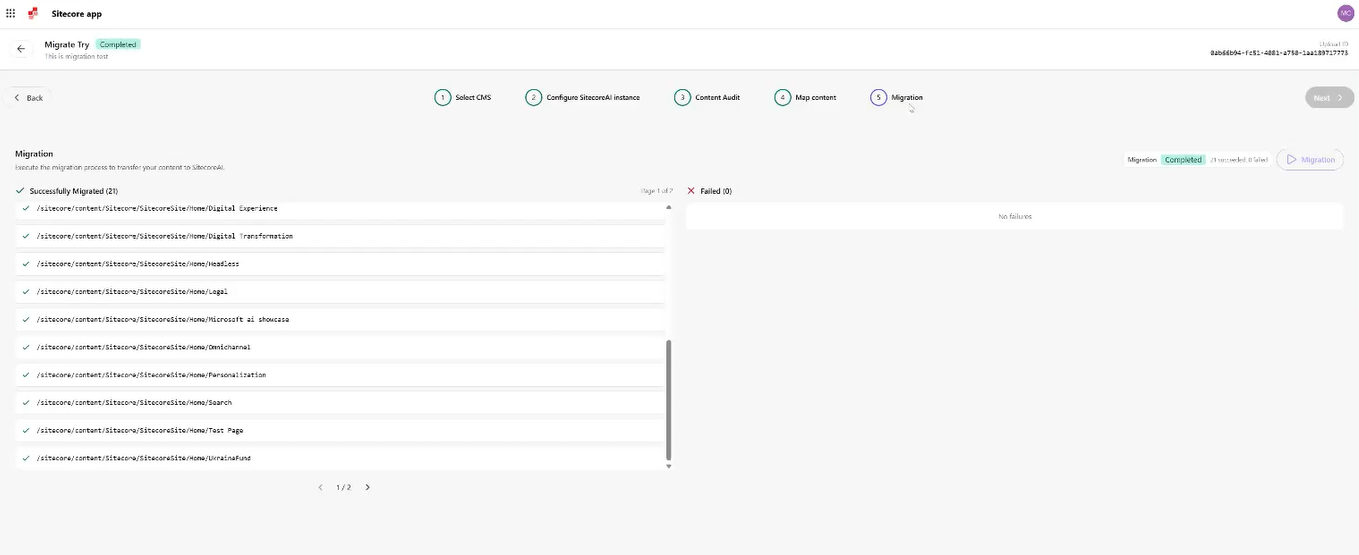
Step 6: Migration Execution
Click the Migration button to begin the migration process. Once completed, Pathway will display successfully migrated items along with any failures.
Key Takeaways and Considerations
Based on hands-on implementation and testing, SitecoreAI Pathway significantly improves migration workflow structure and speed. However, some limitations and operational considerations remain.
Strengths
- Significantly faster migrations compared to traditional manual approaches
- Structured workflow ensures consistency and repeatability
- AI-assisted grouping and mapping reduce manual alignment work
Current Limitations
- Inherited fields are not parsed during target export, which can affect component mappings
- Limited transparency into AI decision-making processes
- No ability to manually override AI-generated mappings
Operational Gaps
- Troubleshooting failed migrations
- Supplementing migrations with custom scripts
- Validating migrated data and content
- Post-migration stabilization and cleanup
Areas for Future Improvement
- Manual editing of AI-generated mappings
- Improved logging and diagnostics
- Greater transparency in AI decision-making
Conclusion
SitecoreAI Pathway represents a major step toward modernizing Sitecore content migrations. By introducing a structured, AI-assisted workflow, it transforms migration from a highly manual and unpredictable process into a more repeatable and scalable one.
Although the platform continues to evolve, it already delivers substantial value by accelerating migration timelines and reducing manual mapping effort. As visibility, control, and customization capabilities improve, Pathway is positioned to become a core tool for Sitecore modernization initiatives.